Cinder Volume is a block storage based on Linux LVM, which can be attached to instance and mounted as a regular file system.
In this tutorial we will show you how to create Cinder Volume in OpenStack and attach it to existing instance as additional partition.
Note: you need to have working OpenStack installation with existing project tenant and running instance in order to proceed with Cinder Volume creation.
Find out how to: Create project tenant in OpenStack and launch instances
1. Log in to your project tenant
Note: After each OpenStack installation a file /root/keystonerc_admin is created on controller node. This file contains admin credentials, like password in clear text. If you ever forget the password, check above file.
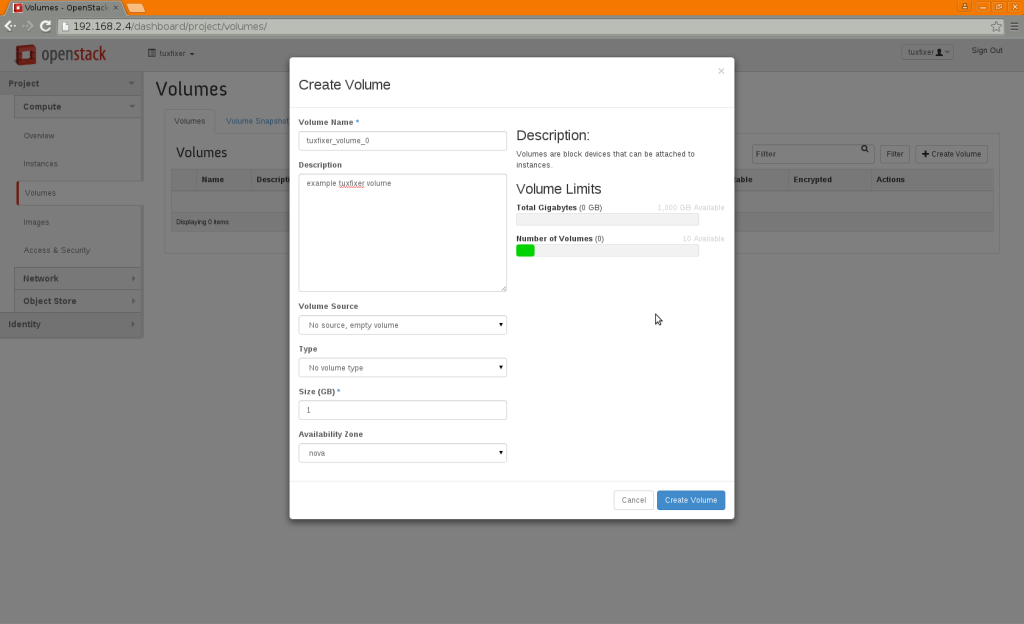
2. Create Cinder Volume
Go to: Project -> Compute -> Volumes -> Create Volume
Edit following parameters:
Volume Name: tuxfixer_volume_0
Description: example tuxfixer volume
Size: 1GB
Availability Zone: nova
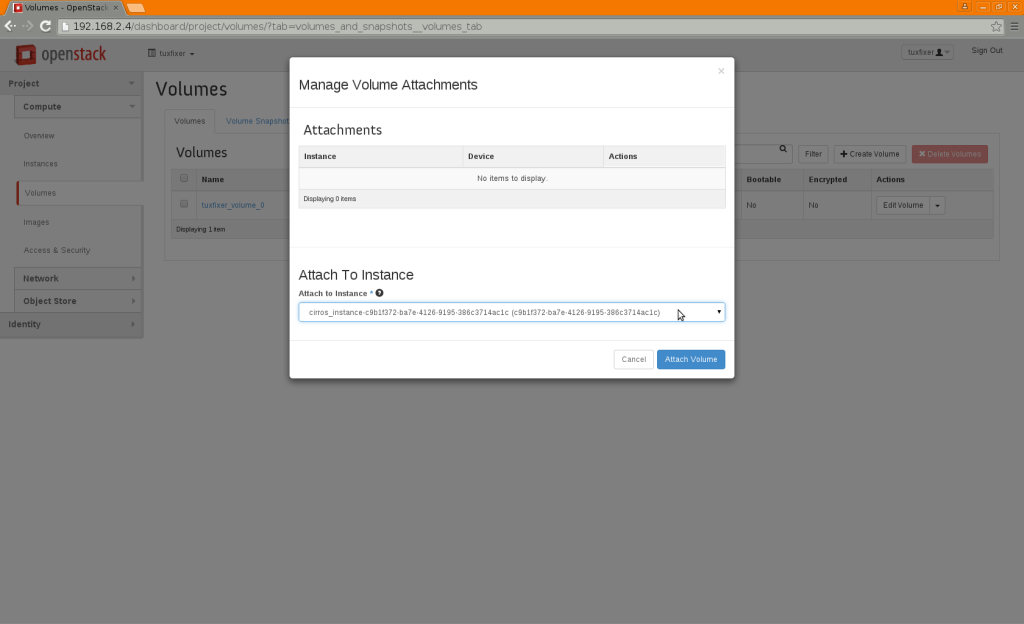
3. Attach volume to existing instance
In Volumes Tab go to: Actions -> Edit Attachments
Attach volume to selected instance (instance can be running or shutdown):
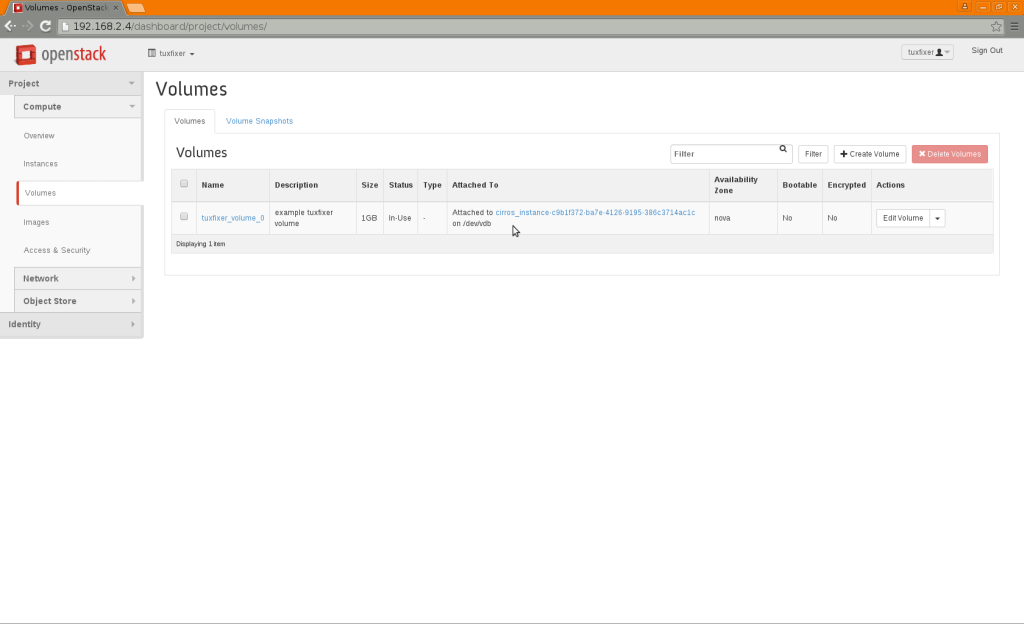
Verify that the volume was attached to the instance:
4. Create file system on new volume
Log in to your instance (either via Floating IP or via internal dashboard console) and display existing disks. There should be additional volume /dev/vdb visible in the system:
[root@controller ~]# ssh cirros@192.168.2.7
cirros@192.168.2.7's password:
$ sudo fdisk -l

Disk /dev/vda: 1073 MB, 1073741824 bytes
255 heads, 63 sectors/track, 130 cylinders, total 2097152 sectors
Units = sectors of 1 * 512 = 512 bytes
Sector size (logical/physical): 512 bytes / 512 bytes
I/O size (minimum/optimal): 512 bytes / 512 bytes
Disk identifier: 0x00000000

   Device Boot      Start         End      Blocks   Id  System
/dev/vda1   *       16065     2088449     1036192+  83  Linux

Disk /dev/vdb: 1073 MB, 1073741824 bytes
16 heads, 63 sectors/track, 2080 cylinders, total 2097152 sectors
Units = sectors of 1 * 512 = 512 bytes
Sector size (logical/physical): 512 bytes / 512 bytes
I/O size (minimum/optimal): 512 bytes / 512 bytes
Disk identifier: 0x00000000

Disk /dev/vdb doesn't contain a valid partition table
Create ext4 file system on /dev/vdb disk:
$ sudo mkfs -t ext4 -L tuxfixer_volume /dev/vdb
mke2fs 1.42.2 (27-Mar-2012)
Filesystem label=tuxfixer_volume
OS type: Linux
Block size=4096 (log=2)
Fragment size=4096 (log=2)
Stride=0 blocks, Stripe width=0 blocks
65536 inodes, 262144 blocks
13107 blocks (5.00%) reserved for the super user
First data block=0
Maximum filesystem blocks=268435456
8 block groups
32768 blocks per group, 32768 fragments per group
8192 inodes per group
Superblock backups stored on blocks:
	32768, 98304, 163840, 229376

Allocating group tables: done
Writing inode tables: done
Creating journal (8192 blocks): done
Writing superblocks and filesystem accounting information: done

$ sudo blkid
/dev/vda1: LABEL="cirros-rootfs" UUID="d42bb4a4-04bb-49b0-8821-5b813116b17b" TYPE="ext3"
/dev/vdb: LABEL="tuxfixer_volume" UUID="6b66183f-6505-4966-a6b7-3706b2066143" TYPE="ext4"
5. Mount new volume in the system
Add mount point for /dev/vdb block device in /etc/fstab file:
$ sudo grep '/dev/vdb' /etc/fstab
/dev/vdb   /mnt      ext4     defaults          0 0
Verify new mount point (/dev/vdb mounted on /mnt directory):
$ sudo df -h
Filesystem                Size      Used Available Use% Mounted on
/dev                    242.3M         0    242.3M   0% /dev
/dev/vda1                23.2M     18.1M      3.9M  82% /
tmpfs                   245.8M         0    245.8M   0% /dev/shm
tmpfs                   200.0K     68.0K    132.0K  34% /run
/dev/vdb               1007.9M     33.3M    923.4M   3% /mnt
Your new volume is now ready to work.


Hi,
Congratulations for all your posts , very useful !!!!
Any post concerning the following subject ? ( or maybe you have some experience to share concerning it )
By adding a shared storage type for volume ( NFS), create an instance bootable from this kind of volume , in order to check migration of this instance from a compute node to another .
Thx for help.
Regards,
J.P.
The following post may partially answer your question regarding Instance migration:
http://212.127.73.129/openstack-create-instance-snapshot-to-backup-restore-migrate-instance/