Nextcloud is a lightweight, open-source StaaS (Storage as a Service) platform, written i PHP and JavaScript, which provides file sync, file sharing and creative collaboration services. The software can be installed on local hardware as a perfect alternative for commercial StaaS solutions like Dropbox, OneDrive, Hightail, etc…
Nextcloud is a typical LAMP (Linux Apache MySQL PHP) software, but instead of ardous and problematic LAMP environment installation and file sharing platform implementation, we can deploy a turnkey Nextcloud platform in just a few minutes, using Docker containers, preferably with docker-compose.
In this article I am launching Nextcloud platform in two Docker containers: nextcloud and mariadb which use local Docker volumes as a file and database storage. This solution will enable us to quickly and painlessly upgrade our Nextcloud to a newer versions in future.
Environment used:
MoBo: GA-J1900N-D3V (Intel® Celeron® Quad-Core J1900 – 4 x 1.99 GHz)
RAM: 8GB DDR3
HDD: 2x1TB (RAID_1/mdadm)
OS: Debian 10 Buster
Steps:
1. Install Docker engine on Debian Buster
Update APT repo index:
root@nextcloud:~# apt-get updateInstall preliminary packages:
root@nextcloud:~# apt-get install apt-transport-https ca-certificates curl gnupg2 software-properties-commonInstall Docker repo GPG key:
root@nextcloud:~# curl -fsSL https://download.docker.com/linux/debian/gpg | apt-key add -Check Docker Repo GPG key fingerprint:
root@nextcloud:~# apt-key fingerprint 0EBFCD88
pub   rsa4096 2017-02-22 [SCEA]
      9DC8 5822 9FC7 DD38 854A  E2D8 8D81 803C 0EBF CD88
uid           [ unknown] Docker Release (CE deb)
sub   rsa4096 2017-02-22 [S]
Add Docker repo:
root@nextcloud:~# add-apt-repository "deb [arch=amd64] https://download.docker.com/linux/debian $(lsb_release -cs) stable"Once again update APT repo index to include packages from freshly added Docker repo:
root@nextcloud:~# apt-get updateInstall the latest version of Docker CE (Community Edition):
root@nextcloud:~# apt-get install docker-ce docker-ce-cli containerd.ioDocker service should be started and enabled by default:
root@nextcloud:~# systemctl status docker
● docker.service - Docker Application Container Engine
   Loaded: loaded (/lib/systemd/system/docker.service; enabled; vendor preset: enabled)
   Active: active (running) since Mon 2019-04-22 21:40:53 CEST; 2min 59s ago
     Docs: https://docs.docker.com
 Main PID: 9137 (dockerd)
   CGroup: /system.slice/docker.service
           └─9137 /usr/bin/dockerd -H fd:// --containerd=/run/containerd/containerd.sock
...
2. Configure firewall (optional)
If you are using firewall, don’t forget to open port 8080/TCP on Docker host to access Nextcloud dashboard from external network.
Personally, I am using UFW on my Docker host and my configuration looks as follows:
root@chieftec:~# ufw status verbose
Status: active
Logging: on (low)
Default: deny (incoming), allow (outgoing), allow (routed)
New profiles: skip

To                         Action      From
--                         ------      ----
22/tcp                     ALLOW IN    Anywhere
8080/tcp                   ALLOW IN    Anywhere
22/tcp (v6)                ALLOW IN    Anywhere (v6)
8080/tcp (v6)              ALLOW IN    Anywhere (v6)
I prefer to have my MariaDB container hidden behind Docker NAT for security reasons, but if you are going to have direct access to your MariaDB container from external network, you should also open port 3306/TCP on your firewall.
3. Launch containerized Nextcloud platform with Docker
As mentined at the very beginning of this article, I split my Nextcloud deployment into separate containers, that is nextcloud and mariadb containers, to have a better clarity of my setup.
In this installation I also assume persistent storage kept in /var/lib/docker/volumes directory of my Docker host to make future upgrades easier. Since all the user-data is stored in the Docker Volumes, any further updates of the Nextcloud application will consist in launching a newer version of Nextcloud container and re-attaching it back to the existing Docker Volume.
It is important to launch mariadb container first, since it’s required to launch nextcloud container later on:
root@nextcloud:~# docker run --name mariadb -v mariadb:/var/lib/mysql -e MYSQL_ROOT_PASSWORD=secret-pass -d mariadbVerify mariadb container:
root@nextcloud:~# docker ps
CONTAINER ID        IMAGE               COMMAND                  CREATED             STATUS              PORTS               NAMES
ddbaa423af74        mariadb             "docker-entrypoint..."   5 seconds ago       Up 4 seconds        3306/tcp            mariadb
Verify IP address of mariadb container, we will need that IP during Nextcloud configuration:
root@nextcloud:~# docker inspect -f '{{range .NetworkSettings.Networks}}{{.IPAddress}}{{end}}' mariadb
172.17.0.2
Now launch nextcloud container with port forwarding from host’s 8080/TCP to container’s 80/TCP port:
root@nextcloud:~# docker run --name nextcloud -v nextcloud:/var/www/html -d -p 8080:80 nextcloudVerify IP address of nextcloud container:
root@nextcloud:~# docker inspect -f '{{range .NetworkSettings.Networks}}{{.IPAddress}}{{end}}' nextcloud
172.17.0.3
Finally verify running containers:
root@nextcloud:~# docker ps
CONTAINER ID        IMAGE               COMMAND                  CREATED             STATUS              PORTS                  NAMES
e58b428995b8        nextcloud           "/entrypoint.sh ap..."   7 seconds ago       Up 5 seconds        0.0.0.0:8080->80/tcp   nextcloud
ddbaa423af74        mariadb             "docker-entrypoint..."   6 minutes ago       Up 6 minutes        3306/tcp               mariadb
Once both Docker containers are running, open up your browser and connect to the Docker host on port 8080:
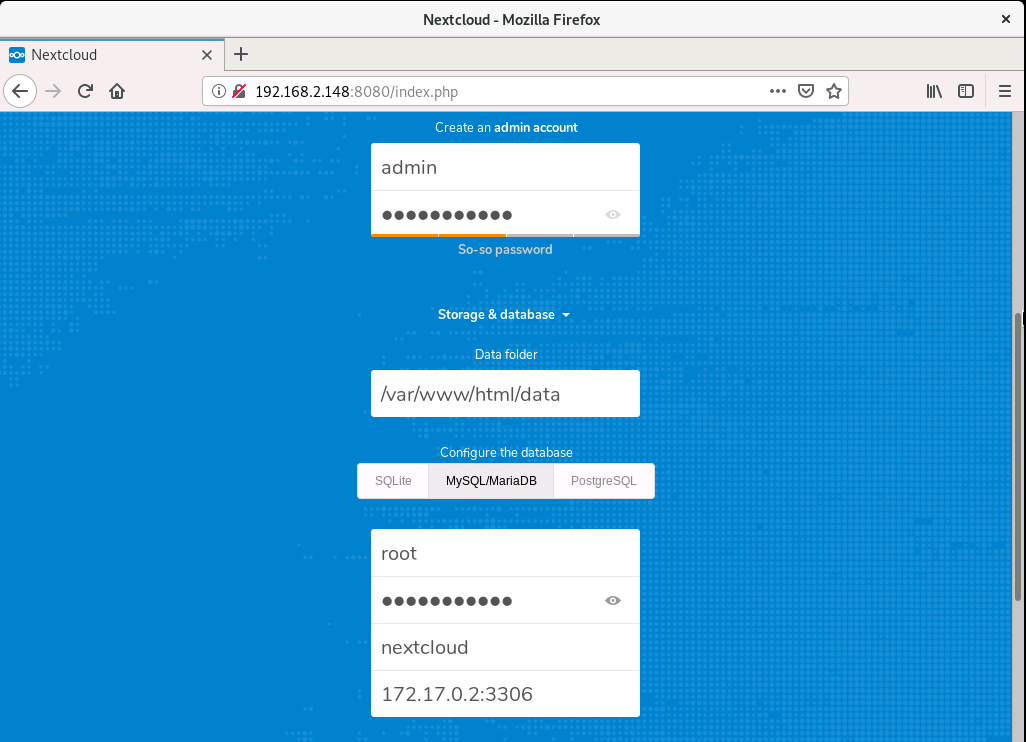
http://192.168.2.148:8080You should be redirected to the nextcloud container’s port 80 and the Nextcloud configuration screen should appear:

In database configuration step don’t forget to enter mariadb container IP instead of docker host IP, since the nextcloud container must communicate with mariadb container inside internal Docker network, that is within 172.17.0.0/16.
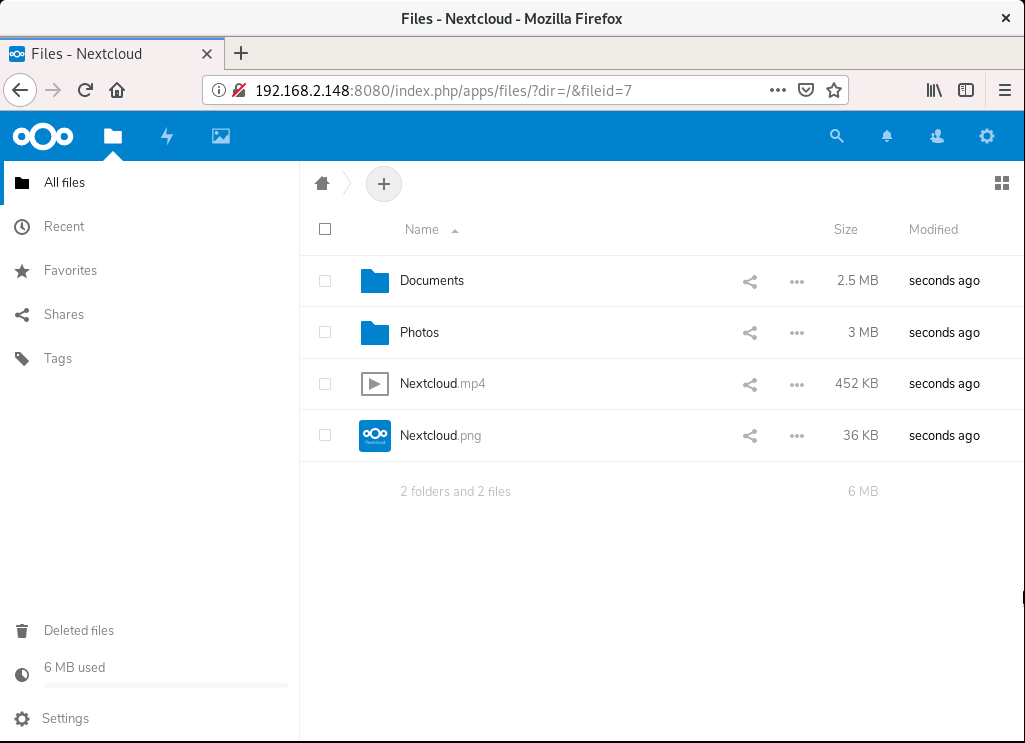
After successfull configuration you should be able to enter the Nextcloud dashboard:

4. Custom configurations (optional)
Below I present additional configurations that you might need in your custom setup.
4.1 Direct access to mariadb container from external network
As mentioned before, you can launch mariadb container with port forwarding option to enable direct access to mariadb container from external network:
root@nextcloud:~# docker run --name mariadb -v mariadb:/var/lib/mysql -e MYSQL_ROOT_PASSWORD=secret-pass -d -p 3306:3306 mariadbVerify container with port forwarding:
root@nextcloud:~# docker ps
CONTAINER ID        IMAGE               COMMAND                  CREATED             STATUS              PORTS                    NAMES
03c21721a9d9        mariadb             "docker-entrypoint..."   20 seconds ago      Up 18 seconds       0.0.0.0:3306->3306/tcp   mariadb
Connect to the database from the remote machine to check if port forwarding on Docker host works properly and we are forwarded to mariadb container:
[root@fixxxer ~]# mysql -h 192.168.2.148 -u root -p
Enter password:
Welcome to the MySQL monitor.  Commands end with ; or \g.
Your MySQL connection id is 10
Server version: 5.5.5-10.3.13-MariaDB-1:10.3.13+maria~bionic mariadb.org binary distribution

Copyright (c) 2000, 2018, Oracle and/or its affiliates. All rights reserved.

Oracle is a registered trademark of Oracle Corporation and/or its
affiliates. Other names may be trademarks of their respective
owners.

Type 'help;' or '\h' for help. Type '\c' to clear the current input statement.

mysql>Note: Don’t forget to open port 3306/TCP on your Docker host, when using direct access to mariadb container from outside.
4.2 Launching specific version of Nextcloud with Docker
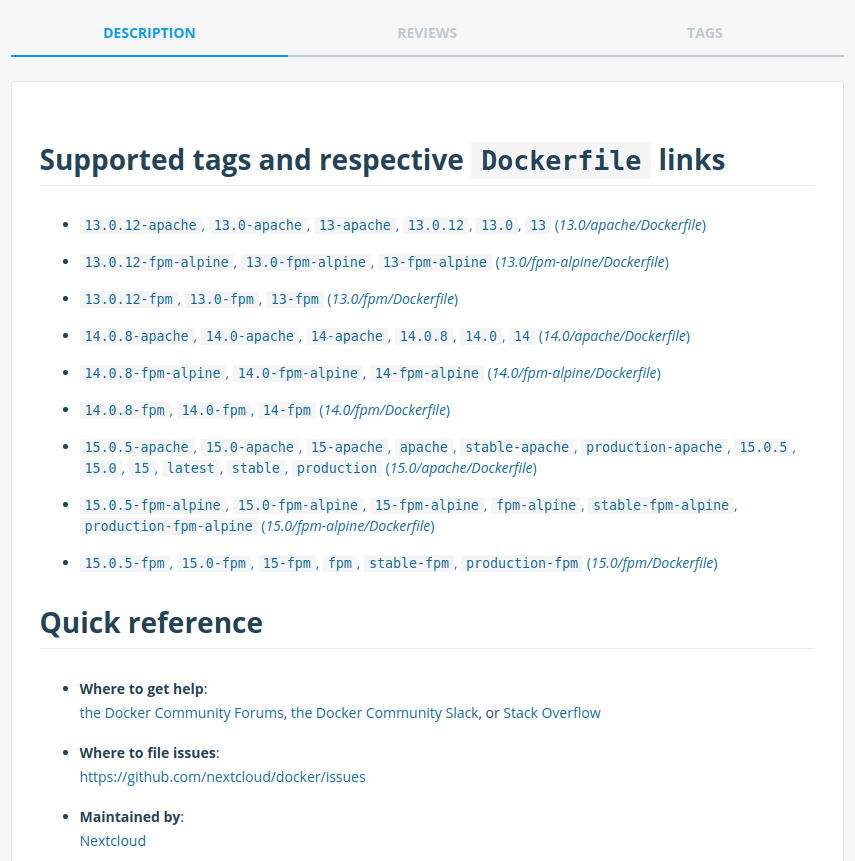
By default Docker pulls and launches the newest available version of the Docker image. If you want to have some control over the version, you can force Docker to pull specific version of the Nextcloud image, i.e. version 15.0:
root@nextcloud:~# docker run --name nextcloud -v nextcloud:/var/www/html -d -p 8080:80 nextcloud:15.0You can always check the available versions of the image on Docker Hub:
https://hub.docker.com
4.3 Launching Nextcloud with Docker using docker-compose
We can use docker-compose binary file to skip executing Docker commands one-by-one and speed up the Nextcloud installation with Docker. It is also a good idea to use docker-compose to quickly stop and start the whole environment, since it tracks container dependencies.
Get docker-compose:
root@nextcloud:~# curl -L "https://github.com/docker/compose/releases/download/1.23.2/docker-compose-$(uname -s)-$(uname -m)" -o /usr/local/bin/docker-composeChange file permissions:
root@nextcloud:~# chmod 700 /usr/local/bin/docker-composeVerify docker-compose version:
root@nextcloud:~# docker-compose --version
docker-compose version 1.23.2, build 1110ad01
Create docker-compose template file:
root@nextcloud:~# touch /root/docker-compose.ymlBelow the example of docker-compose.yml template file for two-container splitted setup with fixed nextcloud:15.0 version, port 8080->80 forwarding and Docker Volumes mapping:
version: '2'

volumes:
  nextcloud:
  mariadb:

services:
  db:
    network_mode: bridge
    image: mariadb
    container_name: mariadb
    command: --transaction-isolation=READ-COMMITTED --binlog-format=ROW
    volumes:
      - mariadb:/var/lib/mysql
    environment:
      - MYSQL_ROOT_PASSWORD=secret-pass
    restart: always

  app:
    network_mode: bridge
    image: nextcloud:15.0
    container_name: nextcloud
    ports:
      - 8080:80
    links:
      - db
    volumes:
      - nextcloud:/var/www/html
    restart: always
Run the whole environment from the same directory where you created the docker-compose.yml file:
root@nextcloud:~# cd /root
root@nextcloud:~# docker-compose up -d
To stop the environment execute:
root@nextcloud:~# cd /root
root@nextcloud:~# docker-compose down
great tutorial thank you, I used it on Debian stretch no problem
Thank you John for feedback!
HI,
I was wondering where was located the Nginx configuration directory ?
I searched on google but every one says it is in /etc/nginx but i don’t have this directory.
It is somewhere in the container ?
Thx
Thib
Hi Thibaut
Yes, the configuration of HTTP server is inside container in /etc/apache2/ directory. It’s not Nginx, it’s Apache.
Excellent write-up!! Complete & thorough. Thank you tons
Hi, thanks for tutorial. I install yesterday and evything was OK but today when I upgrade my server nextcloud doesn’t work. I chceck and IP adresses of mariadb and nextcloud they changed. Now mariadb is 172.17.0.3 an nextcloud is 172.17.0.2. What I have to do now?
Hi Przemek
Thank you for heads-up, I noticed the same and already added in my docker-compose.yaml the below parameters for each service:
network_mode: bridge
This should prevent docker service from changing the IP of particular containers in the future.
If you use persistent storage in your containers, try to shut off all the containers, add network_mode to your docker-compose.yaml and launch containers again.
Thanks for this tutorial but Im getting:
“Error while trying to create admin user: Failed to connect to the database: An exception occurred in driver: SQLSTATE[HY000] [1045] Access denied for user ‘oc_admin’@’172.17.0.3’ (using password: YES) ”
Any clue guys?
Hi , i follow the instruction and nexcloud installed witj sqlite by default !
Great tuto! It’s working! Thx a lot!
Hi Grzegorz, nice tutorial, all works well on mi Debian 10 server, now I want to log in like administrator and not with my user, how can I do that? in another previous installation in docker on a RPI I had 2 account, a standard admin user and a superuser with another UI. thanks for the tutorial and for reply!
Hi
I don’t quite understand your question. At the very beginning when you connect to the Nextcloud dashboard via a web browser, you have to create an admin account (along with storage and database setup). With that admin account, you can do whatever you like – you can create a regular user account or use an admin account on a daily basis. It’s up to you.
Hey thank you for your nice tutorial. Before I start doing this I wanted to ask you, if its possible to have the nextcloud user data on a different hard drive?
So that docker runs on the 120GB SSD, and the masses of data for Nextcloud are located on another 4TB HDD.
I assume that the HDD is mounted on /media/nexcloud.
Is that possible to do?
Hi Christoph
Of course, it is possible.
Docker volumes with Nextcloud user data are kept in /var/lib/docker/volumes.
You can mount the above directory on any type of storage you want, it can be even mounted on a distributed filesystem like GlusterFS, CEPH, or MooseFS – it’s just the mount point.