![]()
HPE Smart Storage Administrator is a tool that allows to quickly configure and manage storage controllers on HPE Proliant servers. HPE SSA offers a simple, intuitive and easy to use GUI interface to quickly create, modify and erase storage arrays based on physical drives installed in the server. HPE SSA replaces the HPE Array Configuration Utility (ACU), and has an updated design for HPE ProLiant servers that enhances the storage experience.
In this short tutorial we will create one of the simplest storage arrays, which is RAID 1 based on two physical drives. RAID 1 (mirroring) provides a replication on all physical drives by writing data to all of them at the same time, it gives us fault-tolerance of N-1 drives where N is a number of used physical drives.
The procedure of RAID 1 setup on HPE Proliant Gen9 server using HPE Smart Storage Administrator is pretty straightforward:
1. Reboot or power on the server
Reboot or power on the server from iLO (Integrated Lights Out) remote console or from server’s front panel.
Note: all the below screenshots are taken from the iLO remote console, which I use for remote communication with the HPE Proliant Gen9 server.
2. Launch Intelligent Provisioning
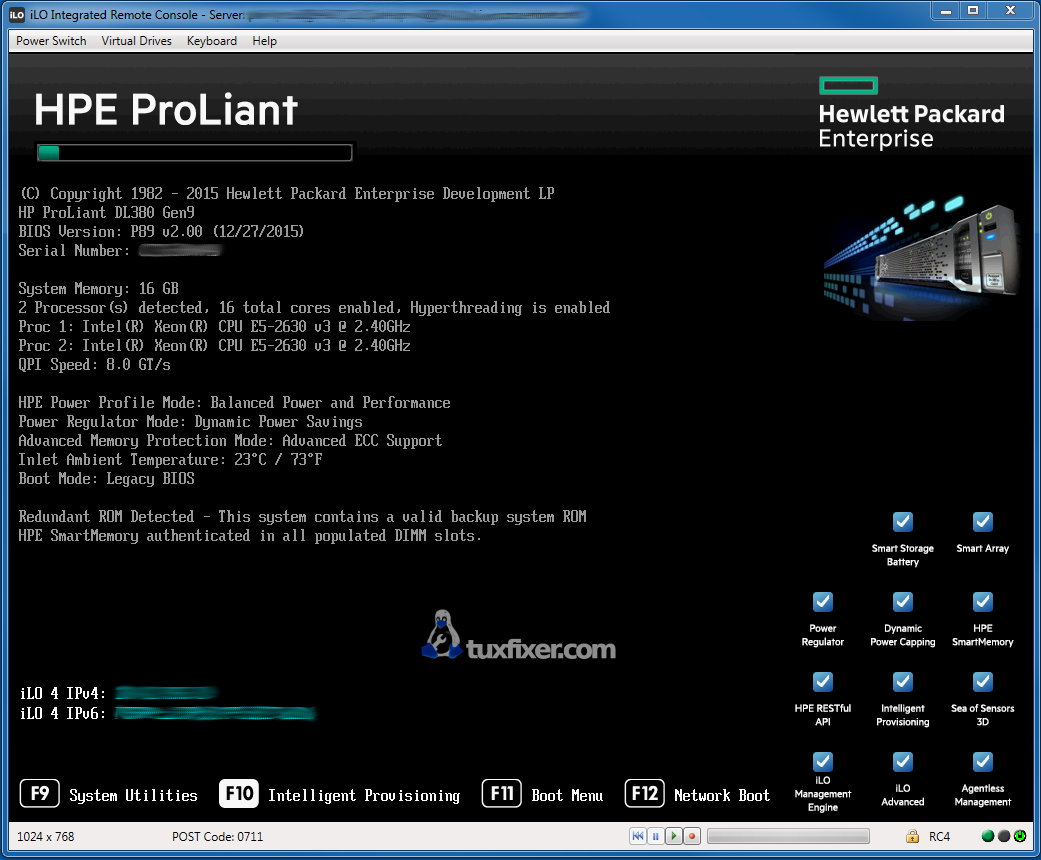
One of the fastest ways to get to HPE SSA leads through HPE Intelligent Provisioning menu. During system POST phase press F10 to launch Intelligent Provisioning:
3. Access HPE Smart Storage Administrator
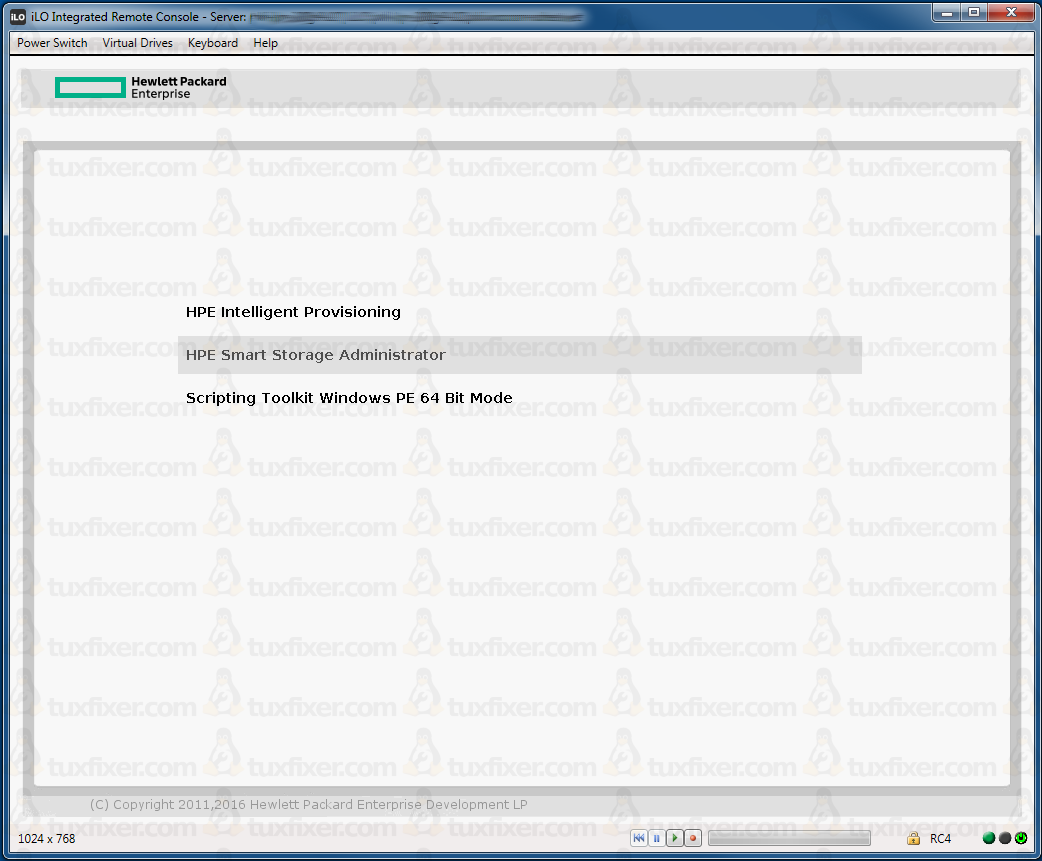
In the HPE Intelligent Provisioning menu select HPE Smart Storage Administrator – you have only 15 seconds, so try to be quick, otherwise you will be redirected to the default option:
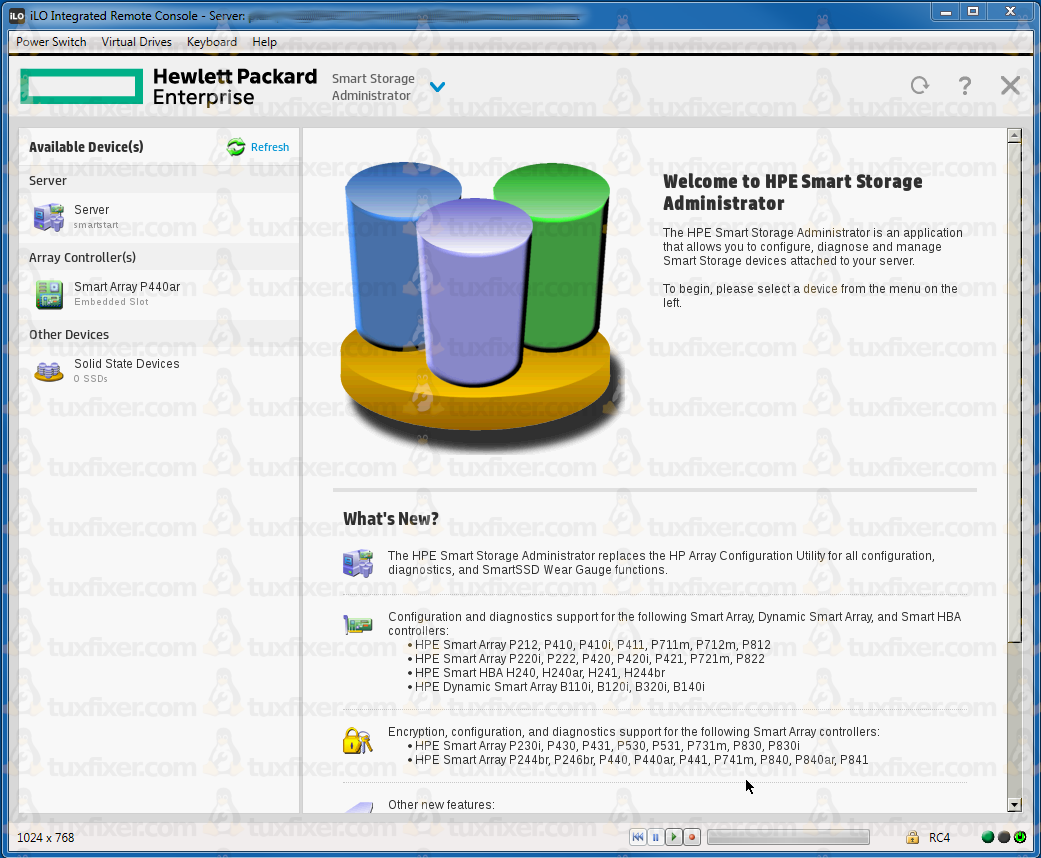
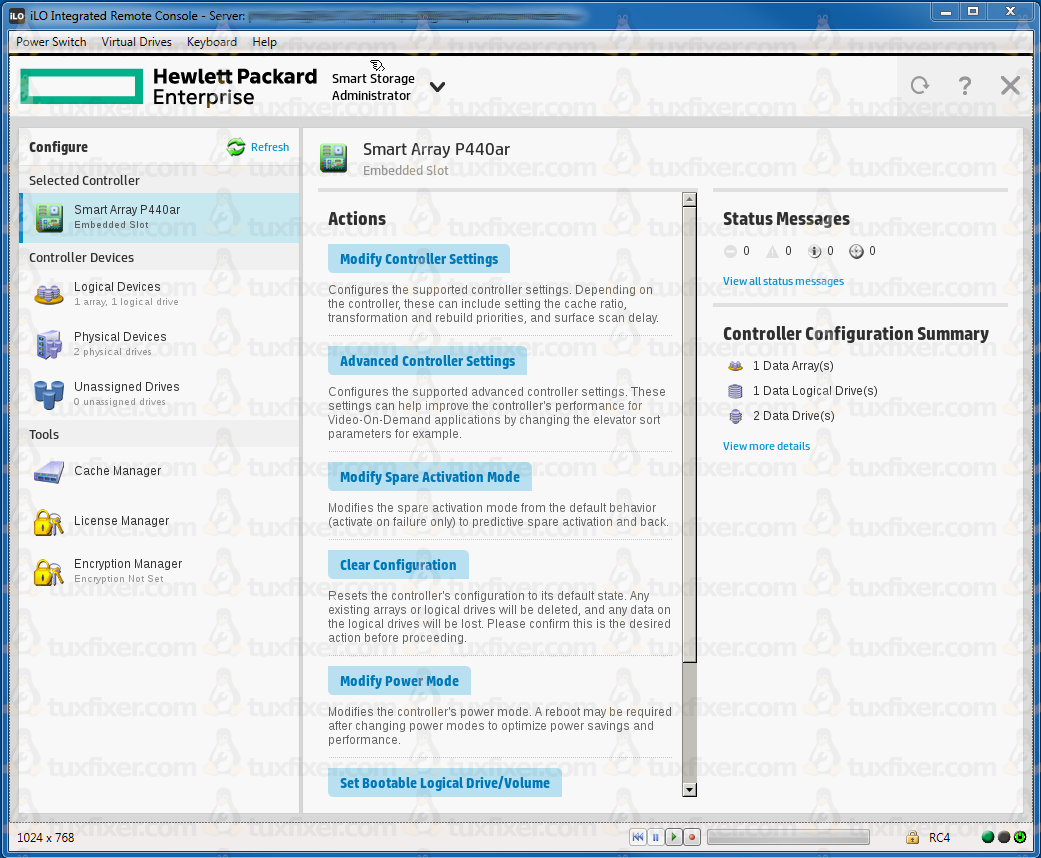
The below picture presents HPE Smart Storage Administrator GUI main screen:
Note: I am using here P440 controller, other servers may be equipped with different controllers, i.e. B140, however since they are all managed by HPE SSA, the procedure of array configuration should be the same for each controller.
4. Create RAID 1 storage array in HPE SSA
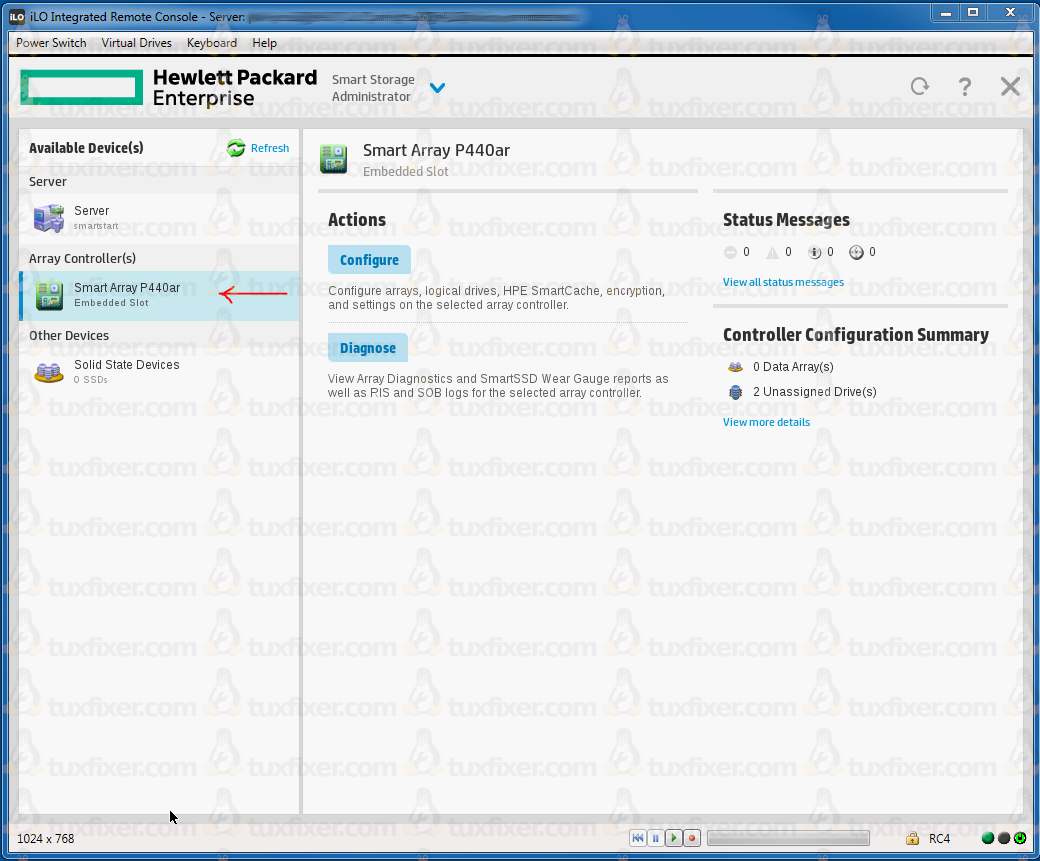
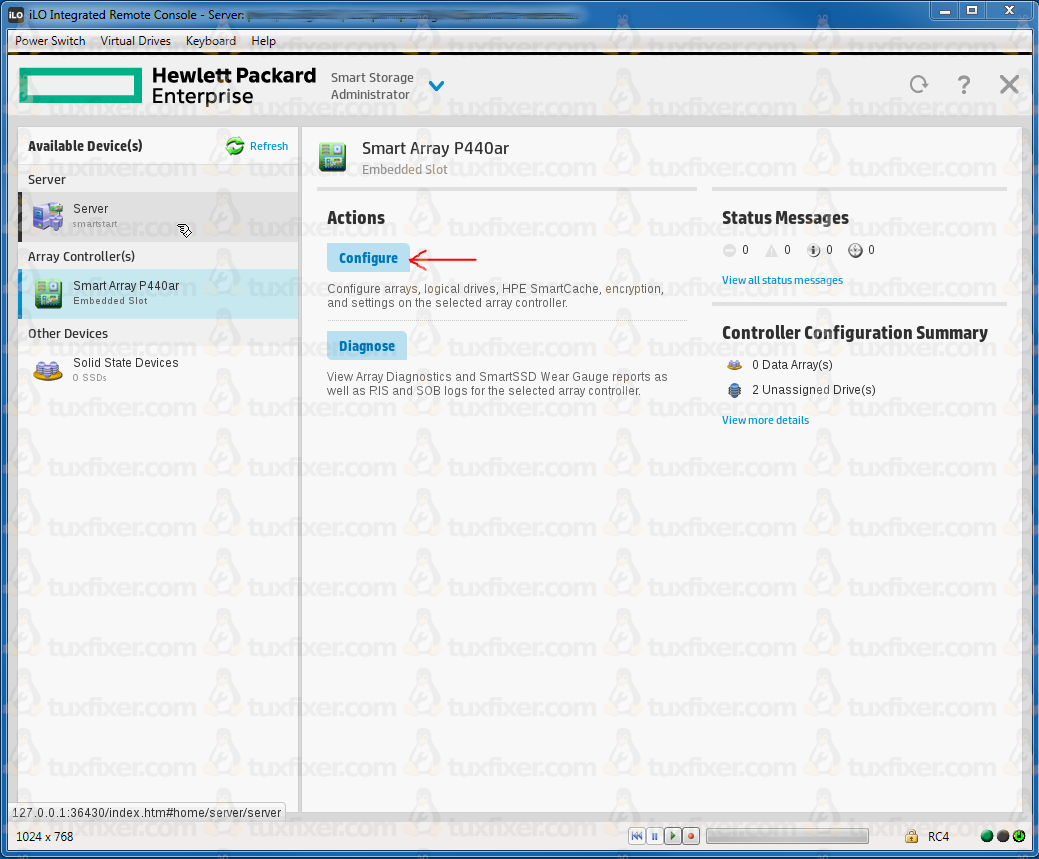
On HPE SSA main screen click on array controller:
In the Smart Array Actions menu choose Configure option:
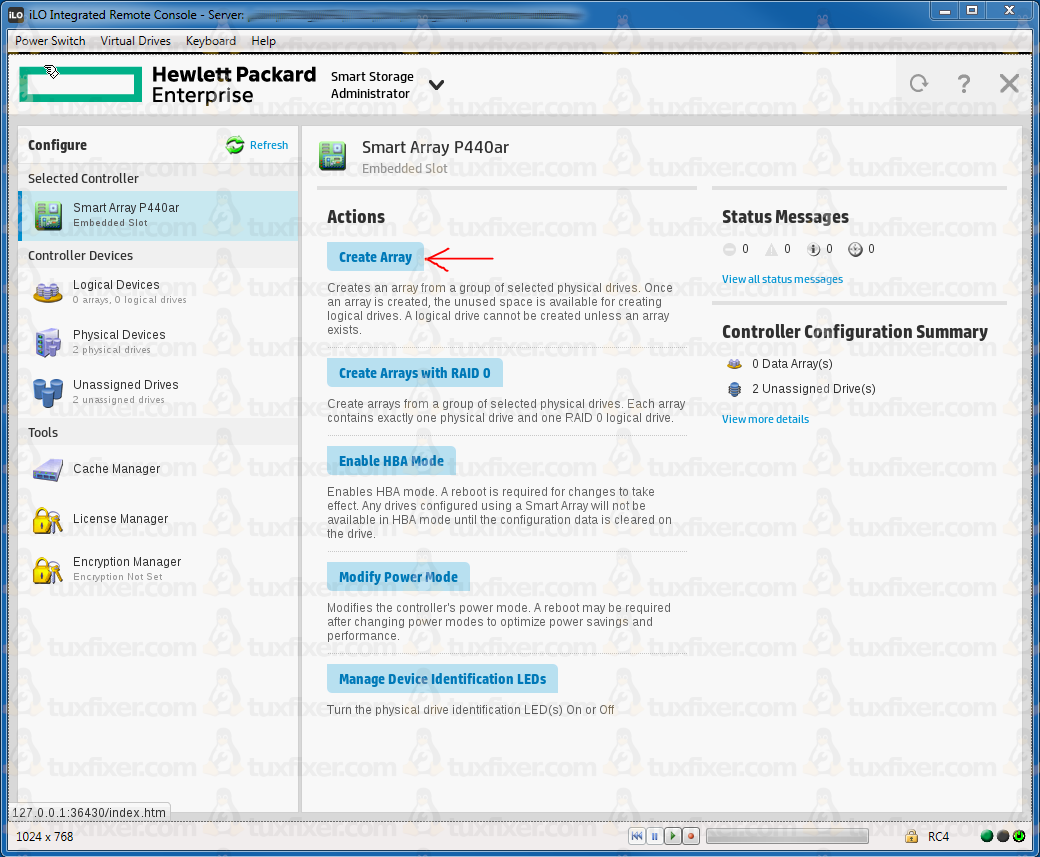
Click on Create Array button:
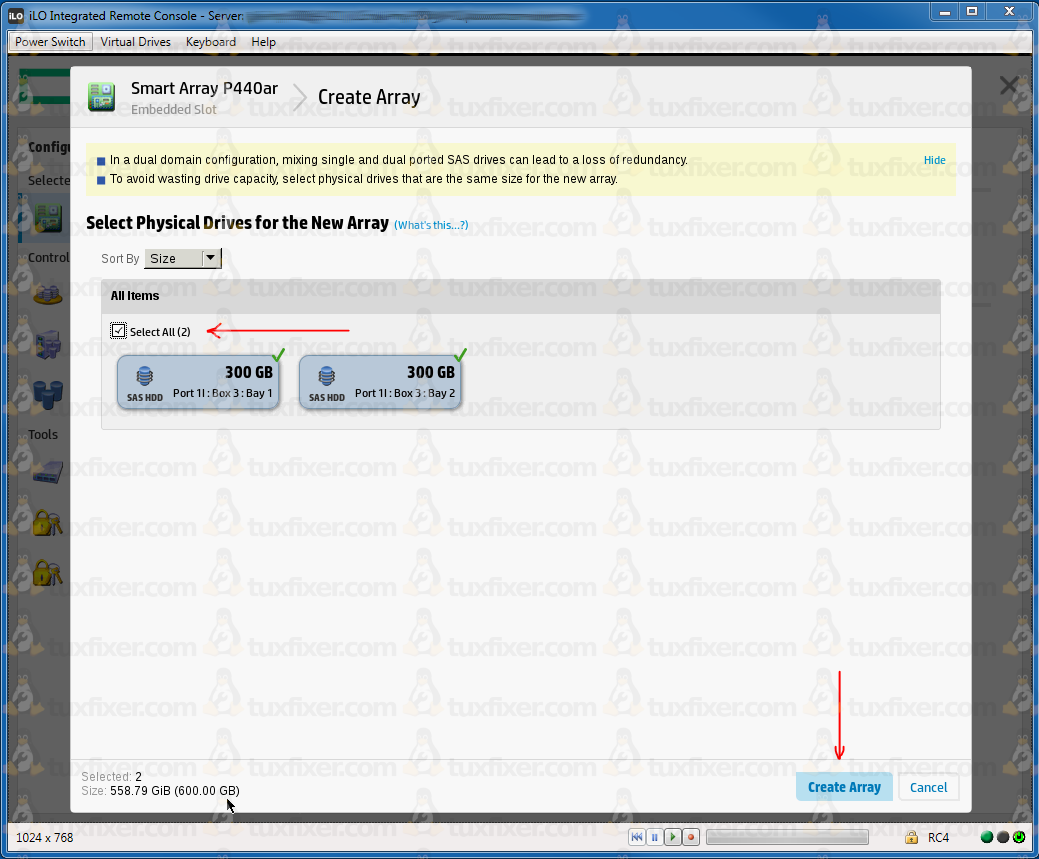
Since I have only two physical drives installed on the server, which is the minimum required for RAID 1 configuration, I have to select all the disks available to create RAID 1 array:
In RAID level section ensure that RAID 1 has been chosen, you can leave the remaining parameters in their default values:
Parameters overview:
- strip size: the successor of stripe size parameter, represents the amount of data that is written to each physical drive. The full stripe size refers to the combined size of all the strips across all physical drives, excluding parity-only drives.
- caching: improves performance by writing data to the cache memory, instead of directly to the logical drives
- size: specifies the size of the logical drive
- sectors/track: this option specifies the number of sectors that comprise each track, the value 32 disables MaxBoot, 63 enables it (this will decrease logical volume performance)
Click on Create Logical Drive button to create RAID 1 array.
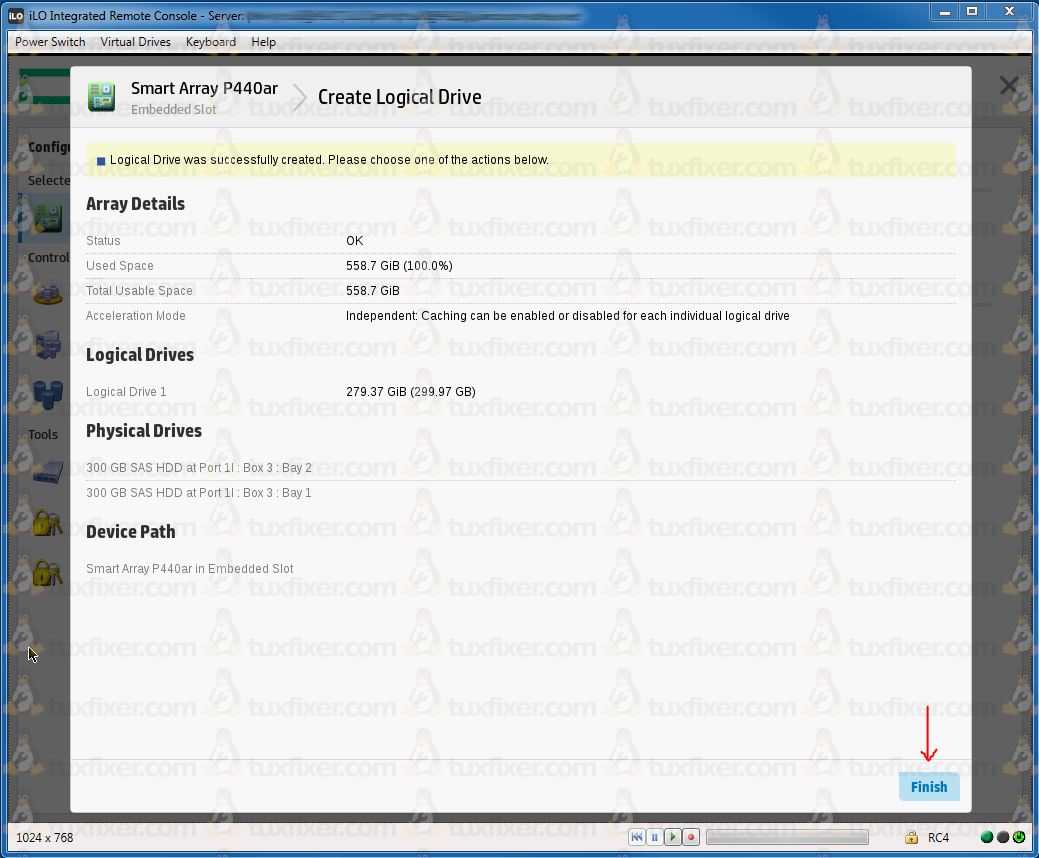
Check summary screen to verify newly created array and click on Finish button:
The new array should now appear in the left pane of the main HPE SSA window:
5. Exit HPE Smart Storage Administrator
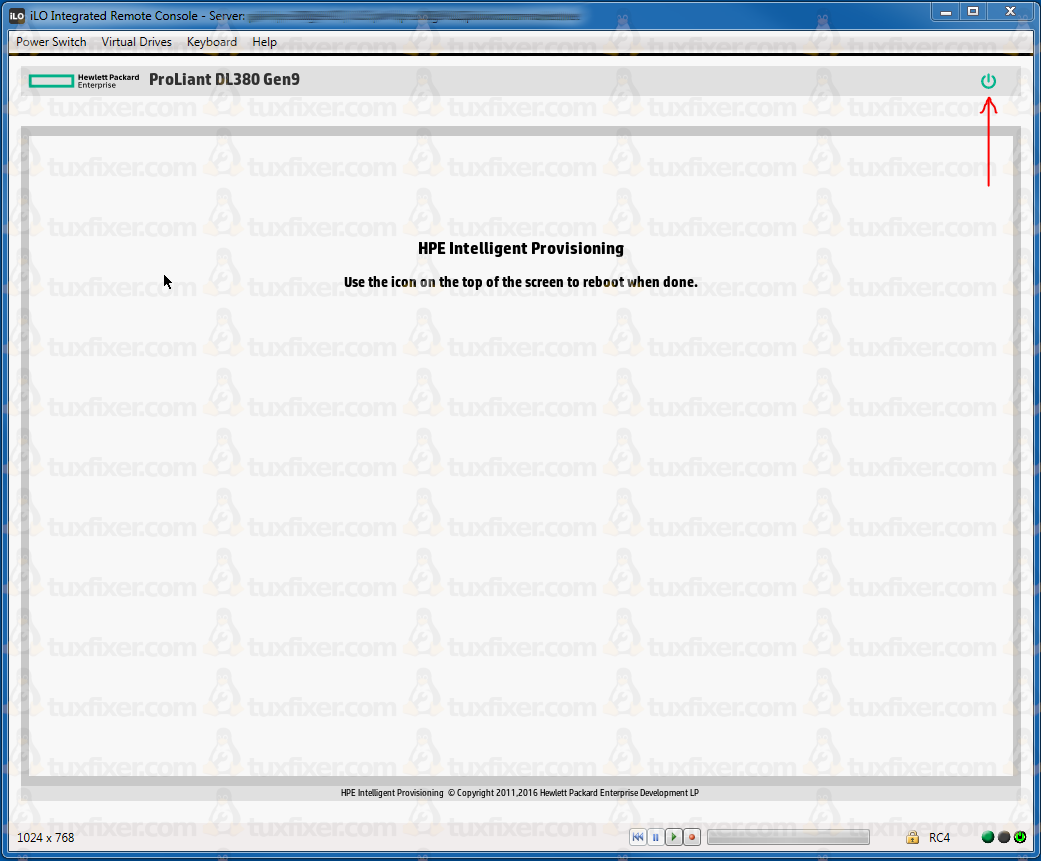
Click on the X button to exit the application, you will be redirected to Intelligent Provisioning screen. On Intelligent Provisioning screen click on the Power Button in the upper right corner to reboot the server:

do you a part 2 installing windows after configuring RAID1