![]()
Debian is a powerful, multipurpose, and super stable Linux distro, however, in my humble opinion, its installation wizard was never a strong point of this Linux distribution, making it pretty difficult to install for beginners. While the standard setup with just a single disk is still relatively digestible for most users, the more sophisticated setup involving RAID with LVM might be pretty hard and arduous. The purpose of this tutorial is to help you go through the whole installation procedure smoothly and painlessly.
In this tutorial, I present Debian 11 (Bullseye) installation based on MD-RAID, configured in Mirroring mode, with an additional Hot Spare drive and LVM partitioning on top of it.
Table of Contents
- Hardware Setup
- Booting from CD/DVD
- Language and Regional Settings
- Network Configuration
- User Configuration
- Physical Disks Partitioning for RAID Personas
- Partition Settings for md0 RAID Persona (boot partition)
- Partition Settings for md1 RAID Persona (LVM)
- Creating Partitions based on the Logical Volumes
- Installing the Base System and Software Packages
- Configuring the GRUB Boot Loader
- Verify the disks setup
1. Hardware Setup
- distro: Debian 11 (Bullseye) amd64
- 1st disk: /dev/vda (KVM-based Virtio block device)
- 2nd disk: /dev/vdb (KVM-based Virtio block device)
- 3rd disk: /dev/vdc (KVM-based Virtio block device)
- RAID mode: RAID1 (Mirroring) + Hot Spare
- RAID personas: md0 (vda1,vdb1,vdc1[spare]), md1 (vda2,vdb2,vdc2[spare])
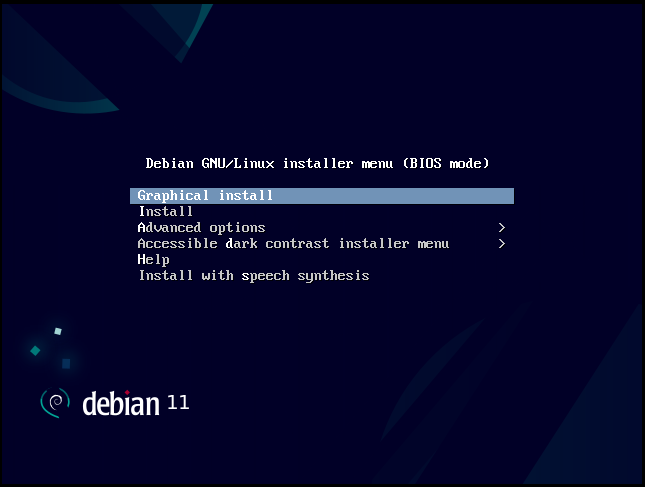
2. Booting from CD/DVD
Boot your server from CD/DVD and choose Graphical install from the Debian installer menu:
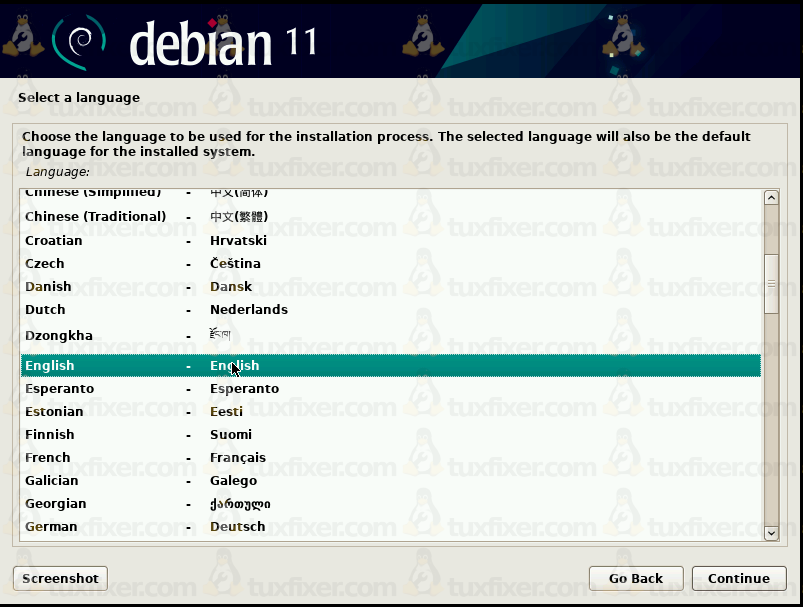
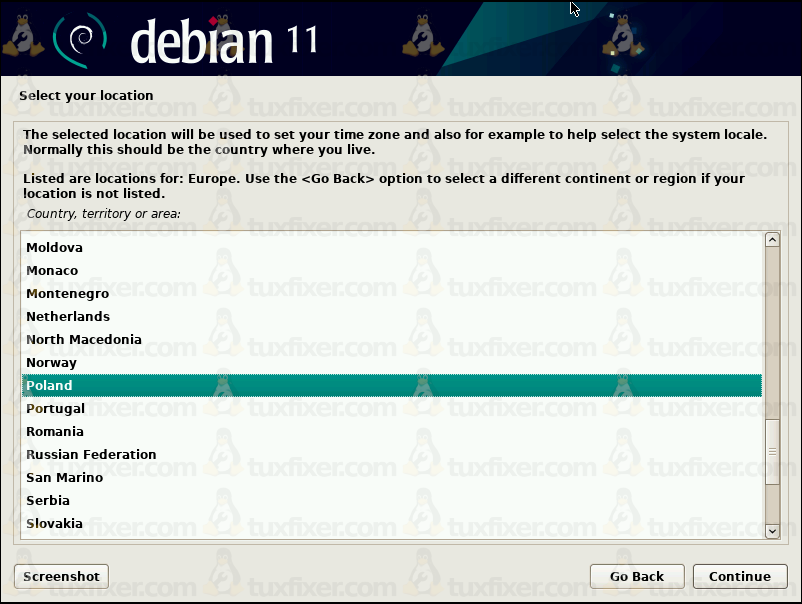
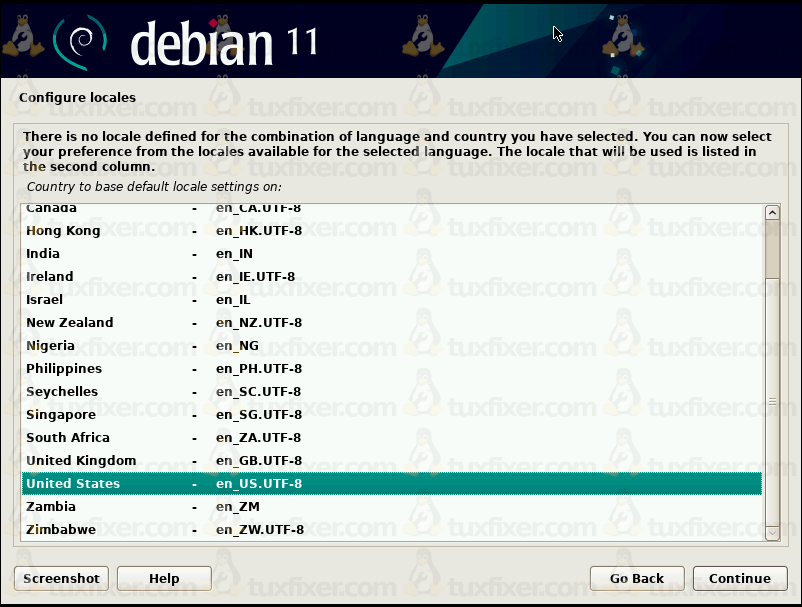
3. Language and Regional Settings
3.1 Select your preferred language
3.2 Select your location
3.3 Configure locales
3.4 Configure the keyboard layout

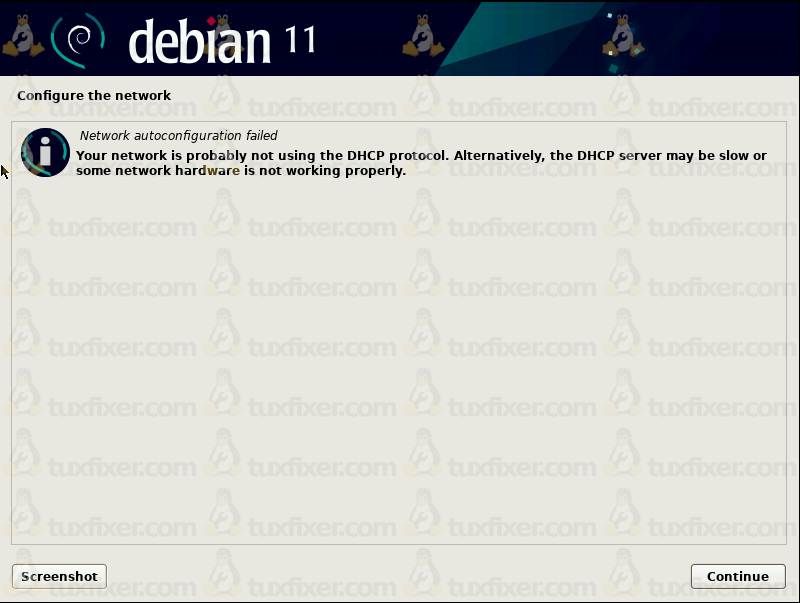
4. Network Configuration
In this tutorial, I use a fixed IP address, and have no DHCP server configured in my network, hence the network autoconfiguration failed:
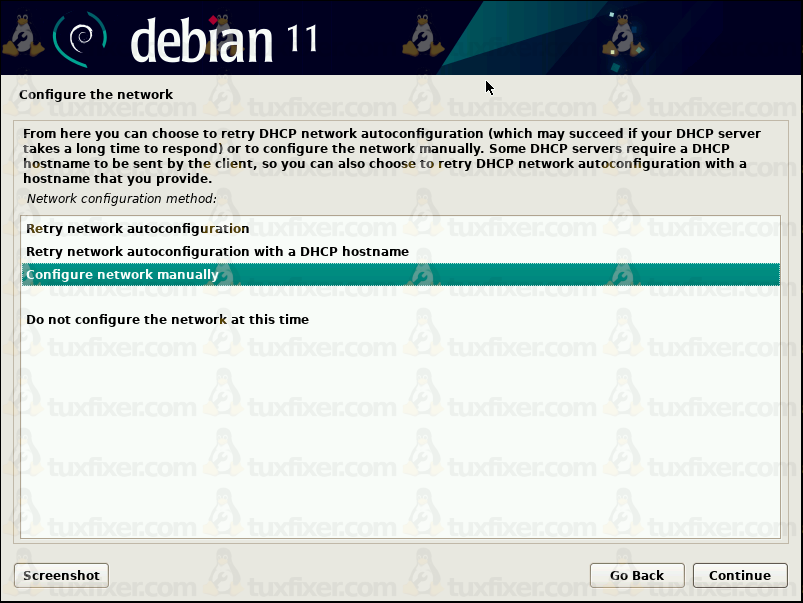
4.1 Configure the network manually (skip this point, if you use DHCP)
Select Configure network manually from the menu:
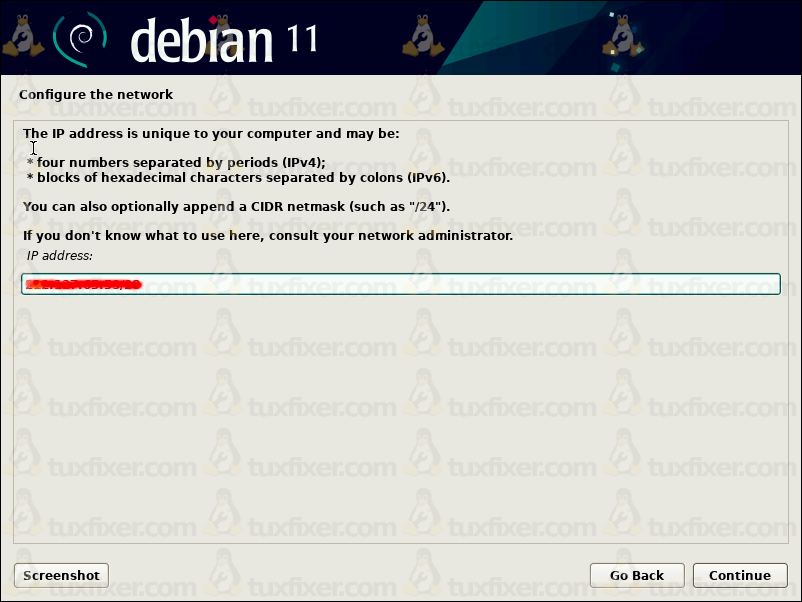
Type your IP address in standard or CIDR format:
Set your Gateway IP address:

Enter DNS servers’ IP addresses (for example Google DNS servers), separated by blank spaces:

Set your hostname:

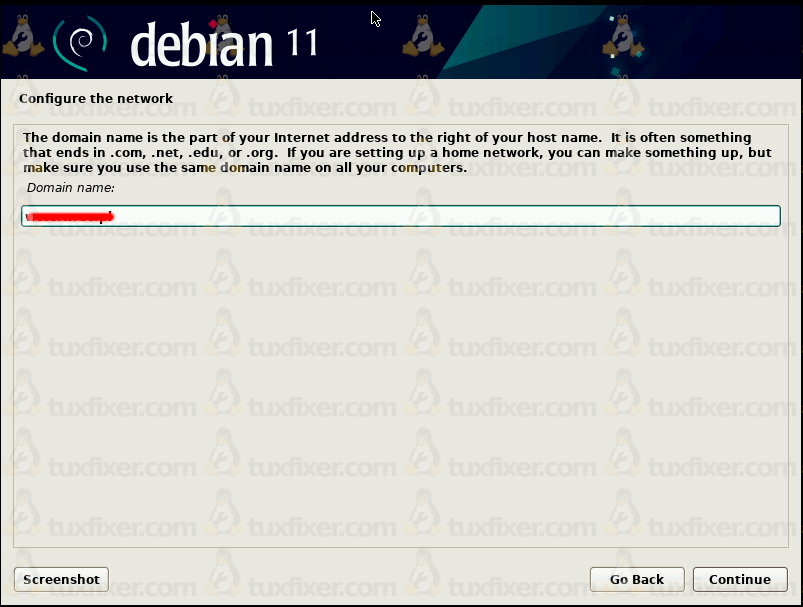
Type your domain name:
5. User Configuration
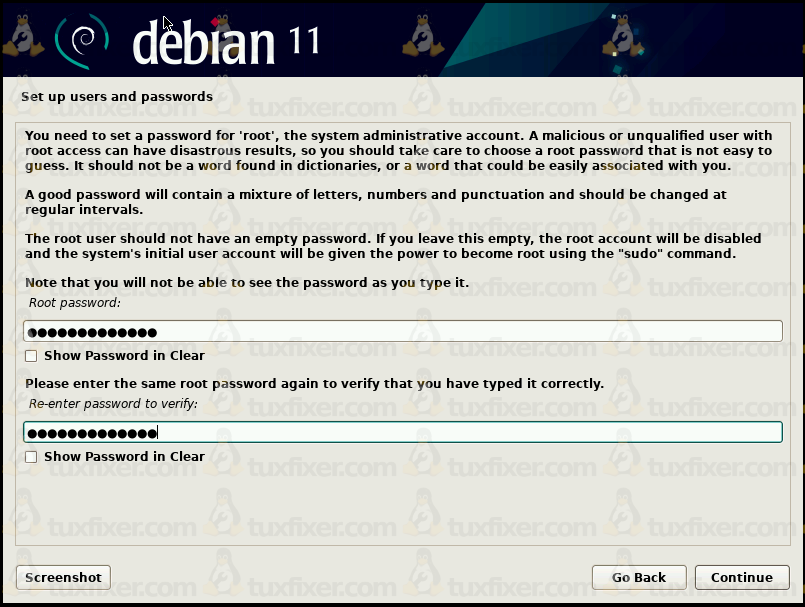
5.1 Set password for root
5.2 Create a regular account
First, type the full name for the new user:

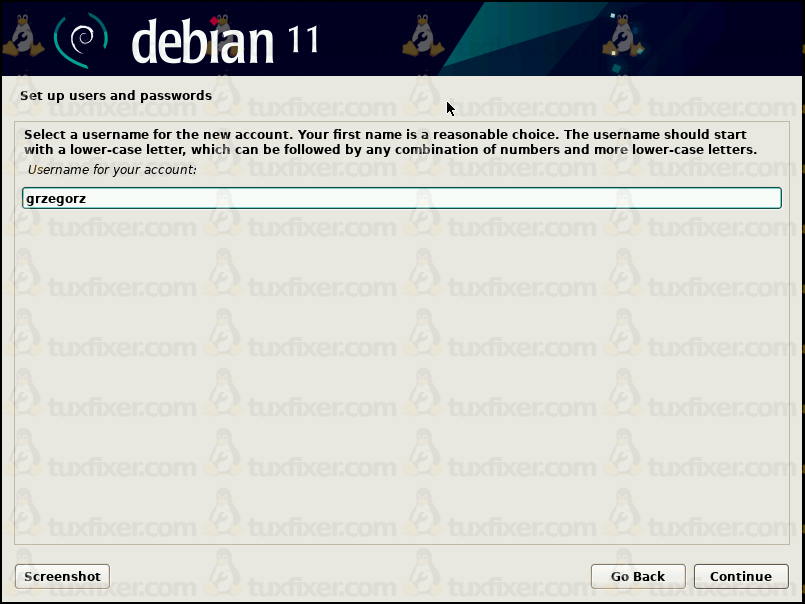
Next, create a username for a regular account:
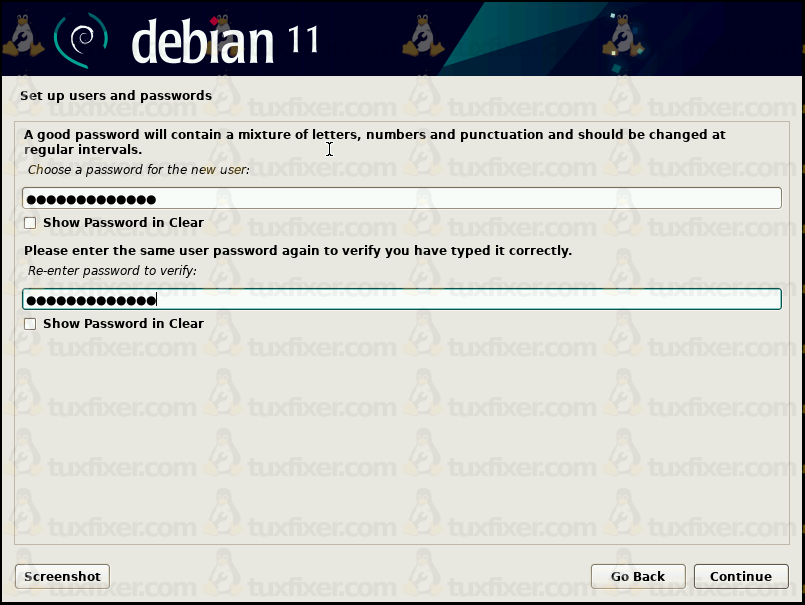
Finally, set a password for a regular user:
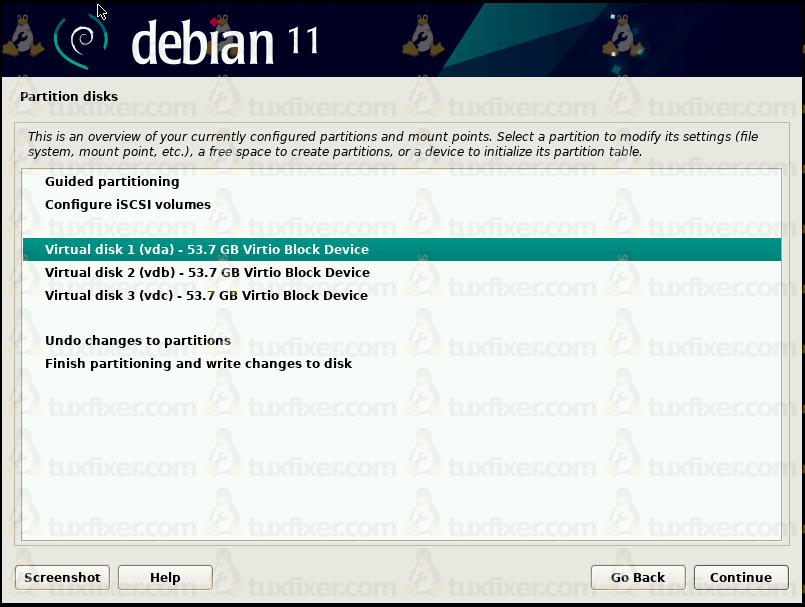
6. Physical Disks Partitioning for RAID Personas
At this point, we will partition all available physical disks into the same way, to create two MD RAID personas:
- /dev/md0 persona for boot partition
- /dev/md1 persona for LVM physical volume (including root and swap logical volumes)
The purpose of creating a separate md0 persona is to host the boot partition. This partition cannot reside on md1 persona, which is intended for LVM, because the GRUB loader can not read from LVM Logical Volume.
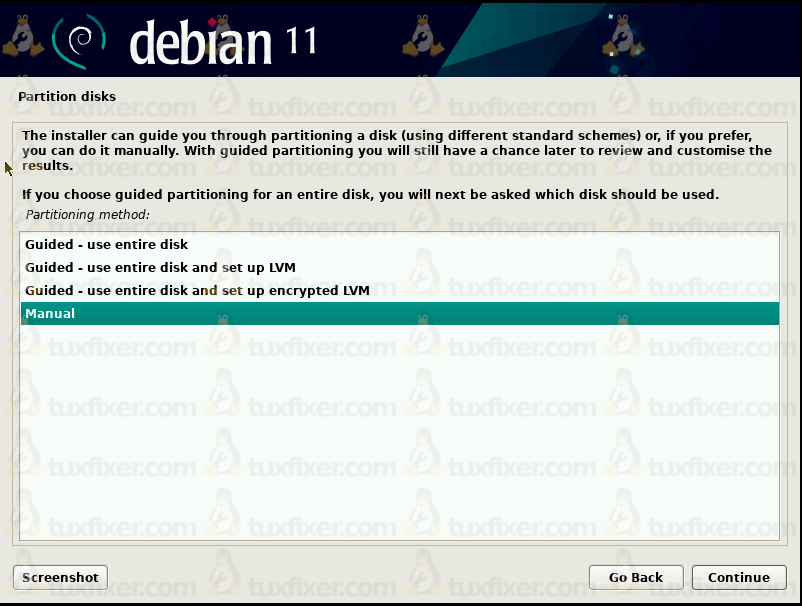
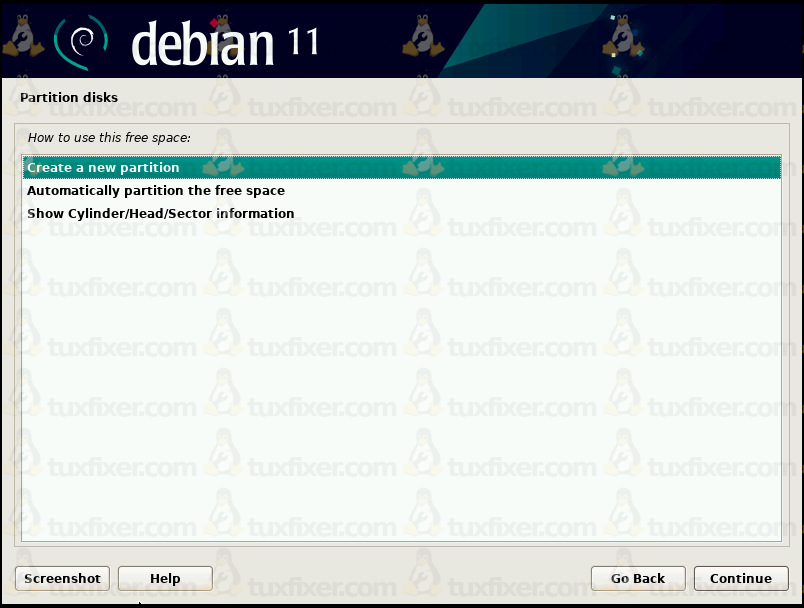
6.1 Select partitioning method
In order to install Debian 11 with software RAID, we need to select the Manual partitioning method:
6.2 Select physical disk for partitioning
Below is the list of all physical disks detected by the Debian 11 installer. Select the first (highlighted) physical volume vda from the list and double click on the selected disk:
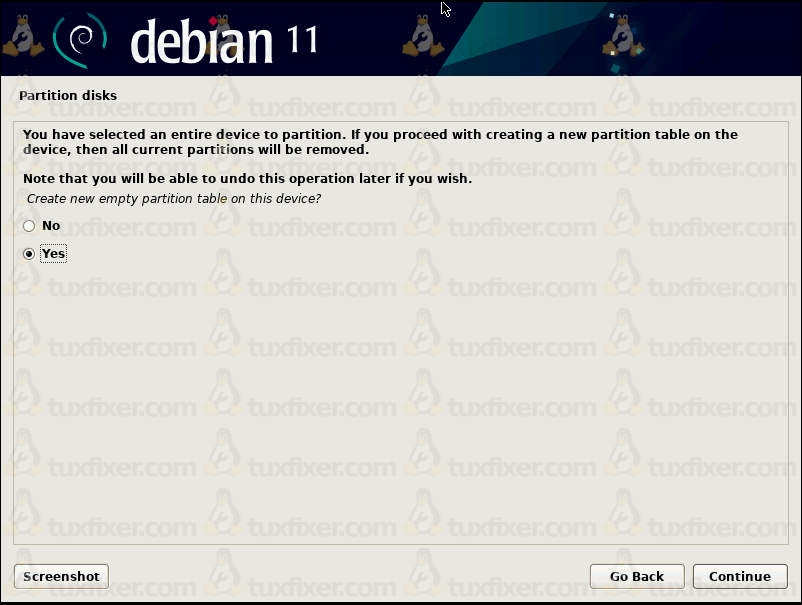
6.3 Create a partition table
Create a new partition table on the first disk:
6.4 Create a partition (for md0 RAID persona)
Now double click on the highlighted FREE SPACE line to create a new partition:
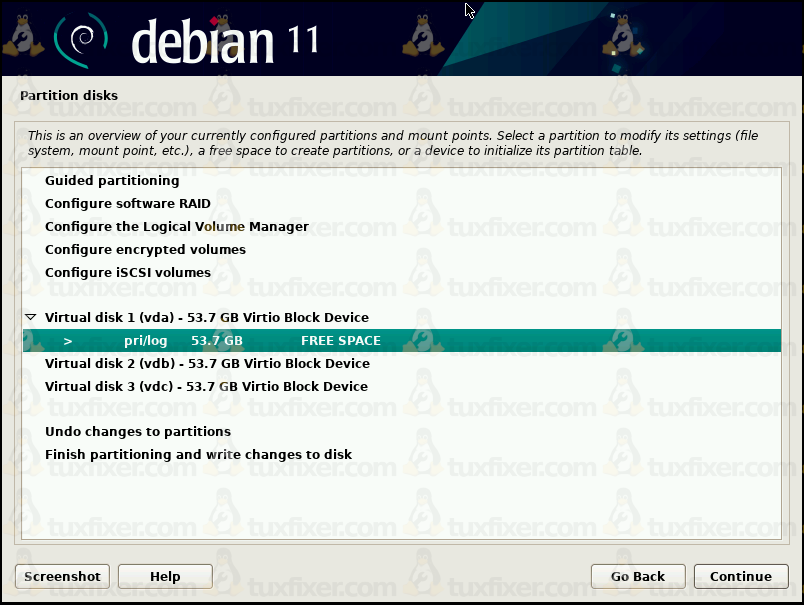
Now select Create a new partition option from the list:

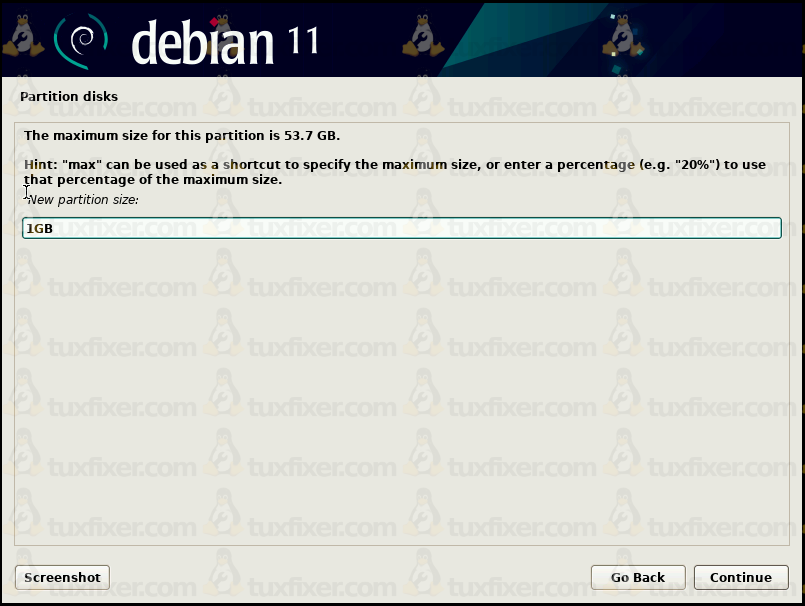
6.5 Set a partition size (for md0 RAID persona)
Choose a new partition size (for example 1GB):
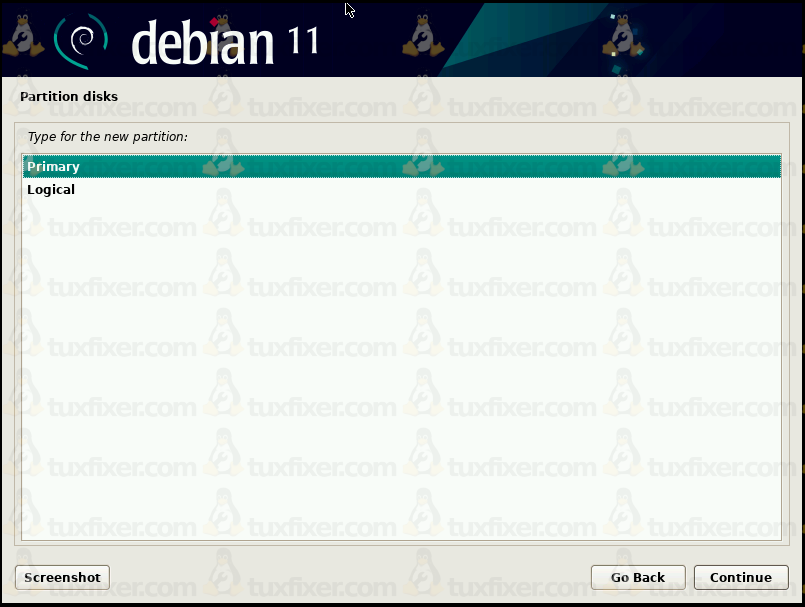
6.6 Choose a partition type (for md0 RAID persona)
Select Primary partition type from the list:
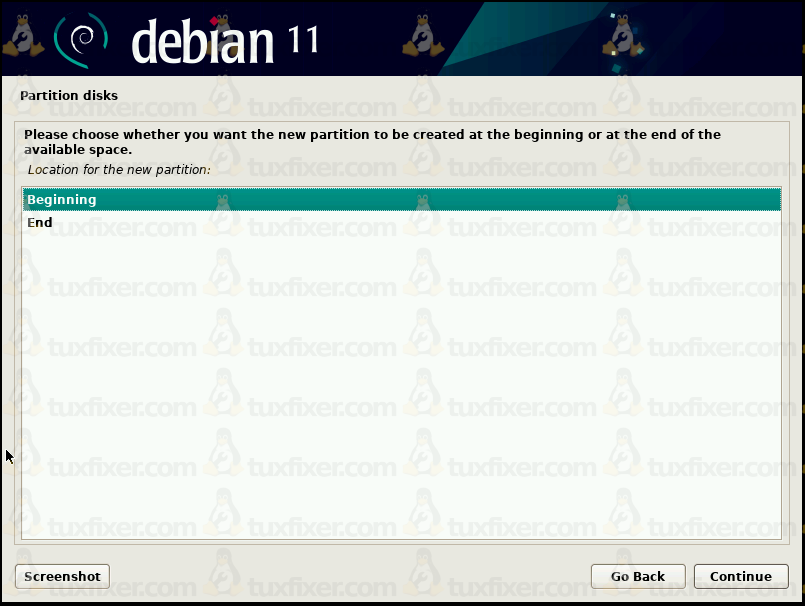
6.7 Choose a partition location (for md0 RAID persona)
Select the Beginning option from the list, since we want to fill the physical disk up with the partitions from its beginning:
6.8 Configure a partition (for md0 RAID persona)
Set partition parameters as follows:
- Use as: physical volume for RAID
- Bootable flag: on
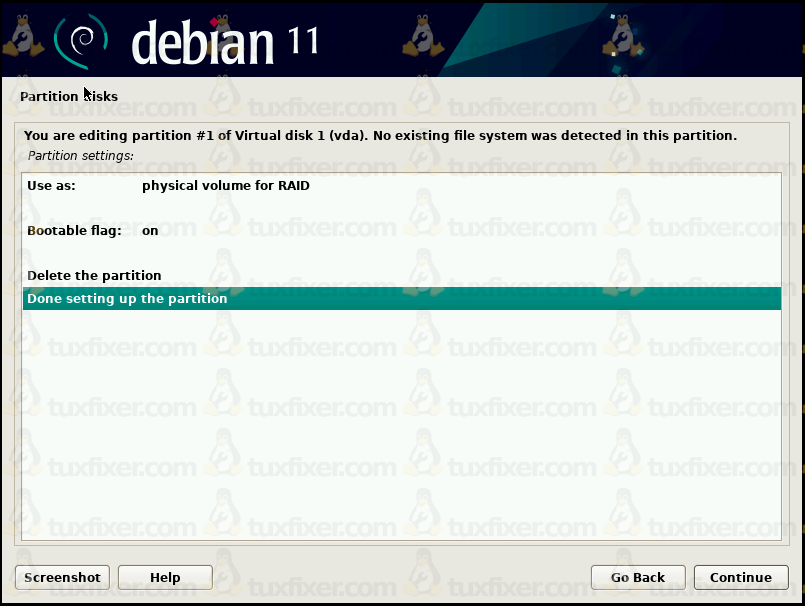
Next, select Done setting up the partition to finish creating a partition for /dev/md0 RAID persona.
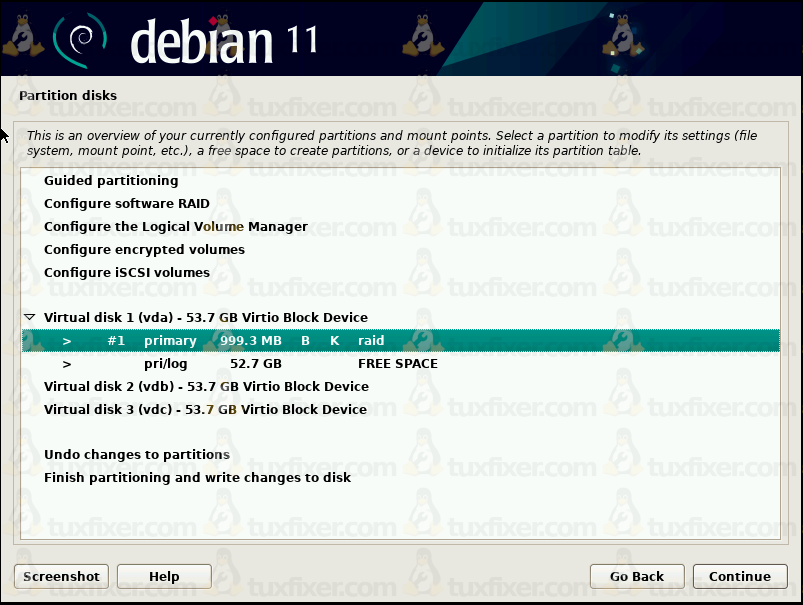
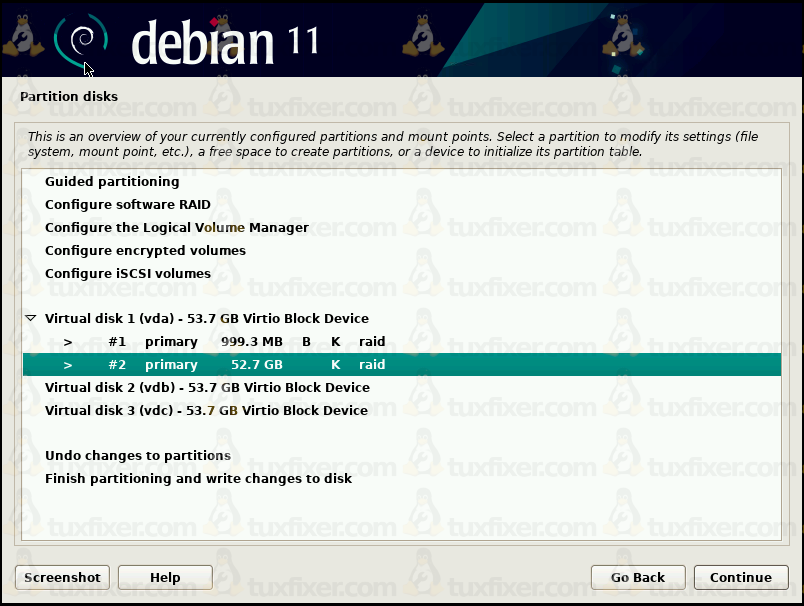
At this point our partition layout on /dev/vda disk looks like the below:
6.9 Create a partition (for md1 RAID persona)
Now it’s time to create a second partition for /dev/md1 RAID persona, which will host a Physical Volume for our LVM Volume Group. Select FREE SPACE line and double click on it:

Now select Create a new partition option from the list:
6.10 Set a partition size (for md1 RAID persona)
In this example, I am using the maximum available space on the disk, since I am not planning any more RAID personas in the future:

6.11 Choose a partition type (for md1 RAID persona)
Select Primary partition type from the list:

6.12 Configure a partition (for md1 RAID persona)
Set partition parameters as follows:
- Use as: physical volume for RAID
- Bootable flag: off
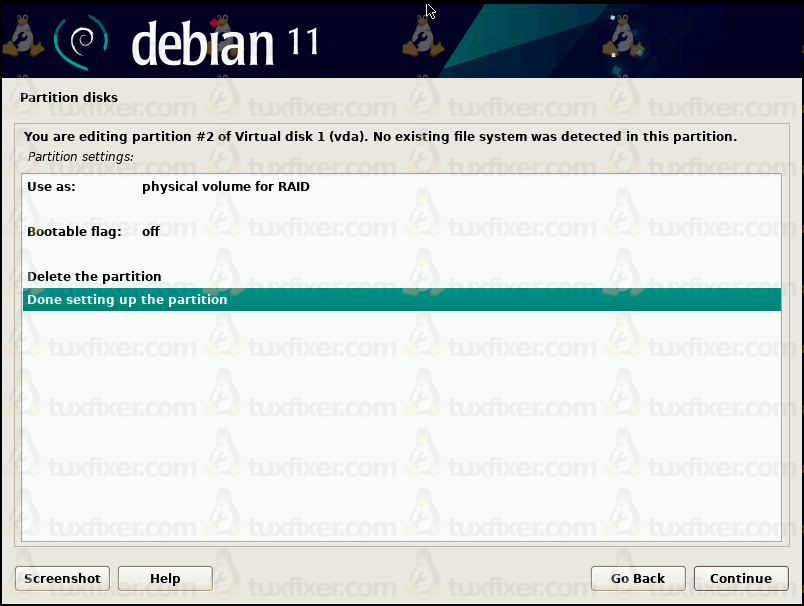
Finally, select Done setting up the partition to finish creating a partition for /dev/md1 RAID persona.
At this stage of installation our partition layout on /dev/vda disk looks like the below:
6.13 Create RAID partition layout on the remaining disks
Repeat steps 6.2 – 6.12 for the remaining disks, that is /dev/vdb and /dev/vdc (Hot Spare).
Finally, our partition layout on all disks should look like on the below picture:
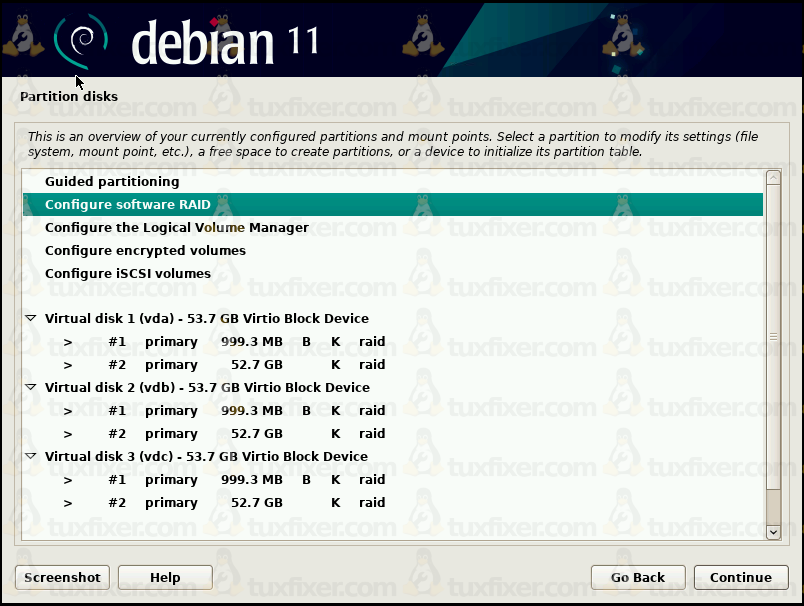
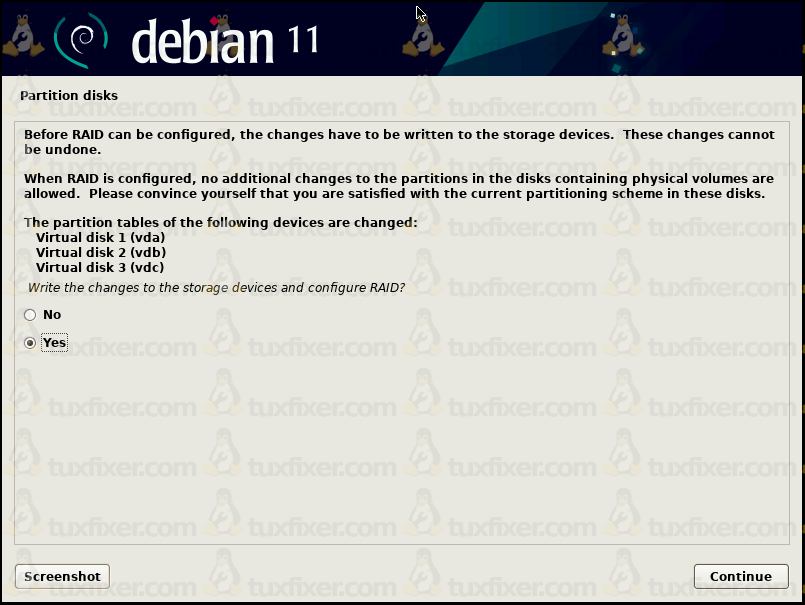
Now, select the Configure software RAID option and click on the Continue button.
Next, check the Yes radio button to write the changes to the storage devices and configure RAID, and click on the Continue button.
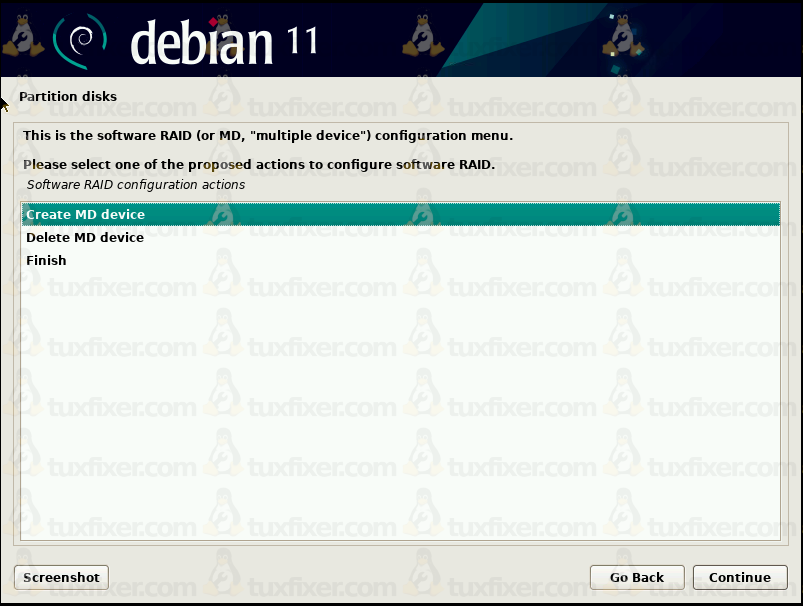
6.14 Create md0 RAID persona for boot partition
Now we are creating /dev/md0 persona from the specific partitions on each disk.
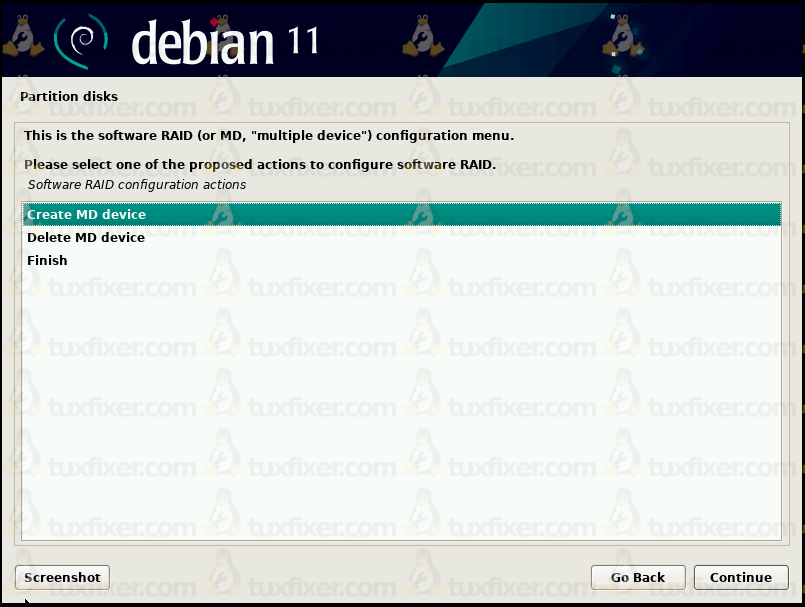
Select the Create MD device option:
As stated at the very beginning of this tutorial, we are creating a RAID1 (Mirroring) setup:

Our RAID1 setup is going to be built on exactly 2 (two) devices:
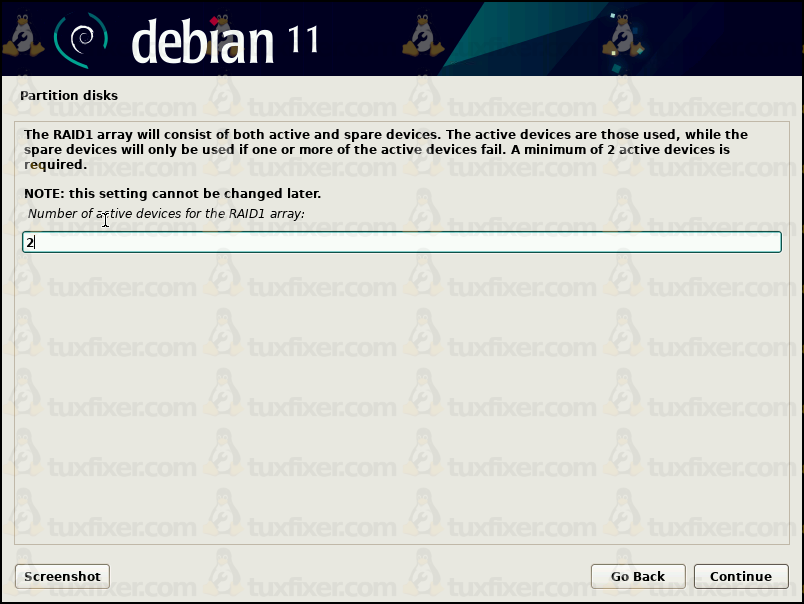
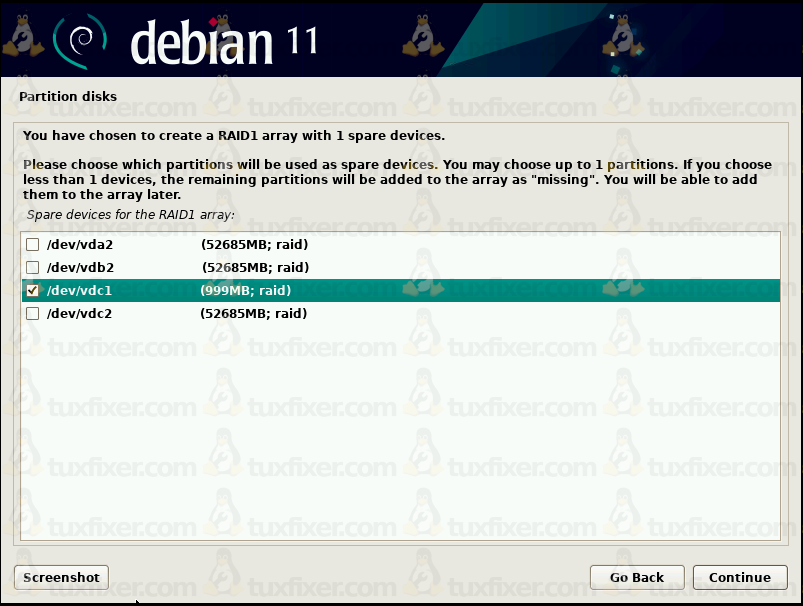
We are going to use exactly 1 (one) Hot Spare device:

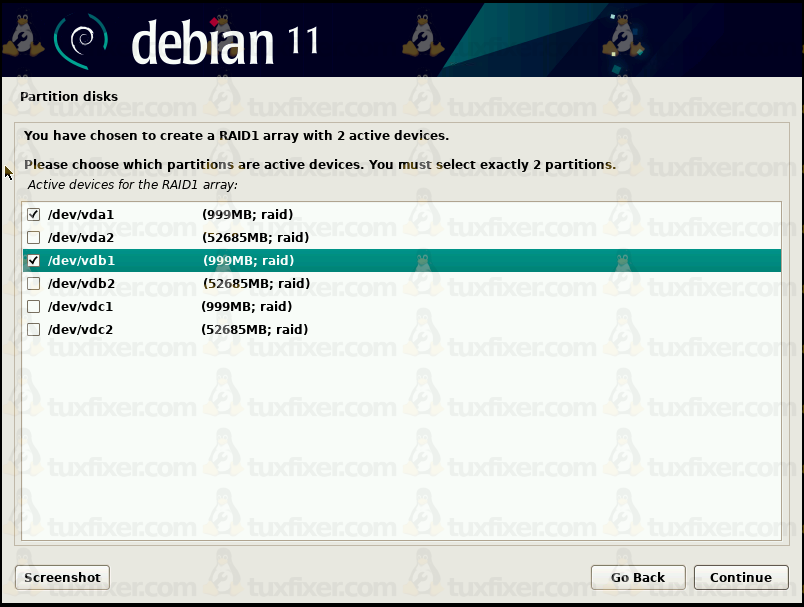
Create the md0 persona based on /dev/vda1 and /dev/vdb1 previously prepared partitions:
Choose /dev/vdc1 as a spare device for our md0 RAID persona:
We have successfully created the md0 RAID persona for boot partition, where we are going to mount /boot directory.
6.15 Create md1 RAID persona for LVM
Now it’s time to set up /dev/md1 persona from the specific, previously prepared partitions on the disks, to create a Physical Volume for Logical Volume Manager (LVM).
Select the Create MD device option once again:
Here, again, we are creating a RAID1 setup, this time for md1 persona:

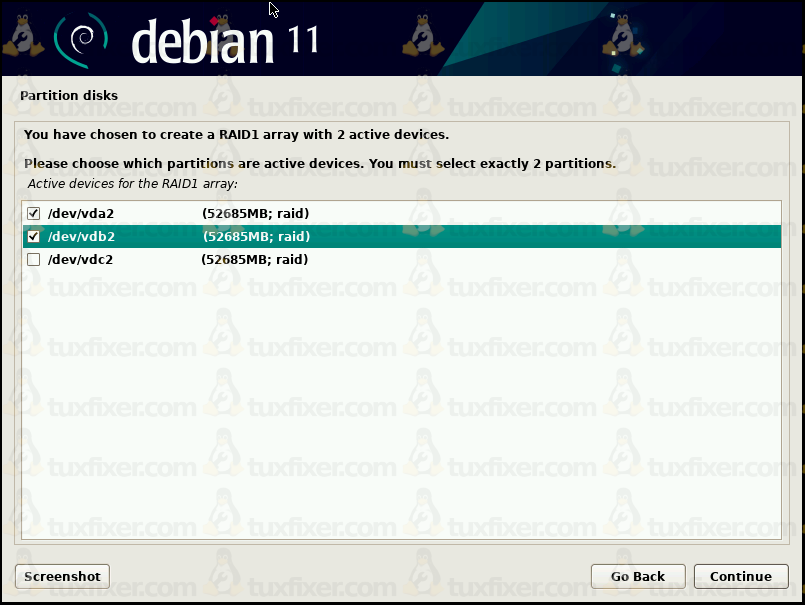
Type in 2 (two) active devices for RAID1 array:

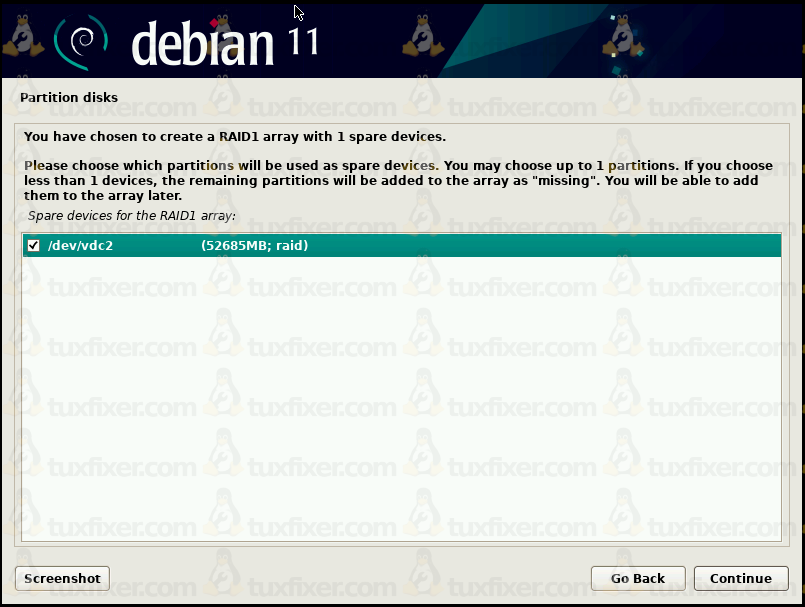
Type in 1 (one) spare device for RAID1 array:

Pick /dev/vda2 and /dev/vdb2 partitions as active devices for md1 persona:
Choose /dev/vdc2 as a spare device for md1 persona:
Now select the Finish option and click on the Continue button:

We have finished creating the md1 RAID persona for LVM Physical Volume, where the root filesystem and the swap partition will reside.
At this stage of installation, our disk setup is presented in the below picture. Newly created RAID personas: md0 and md1 are marked by the red rectangle:
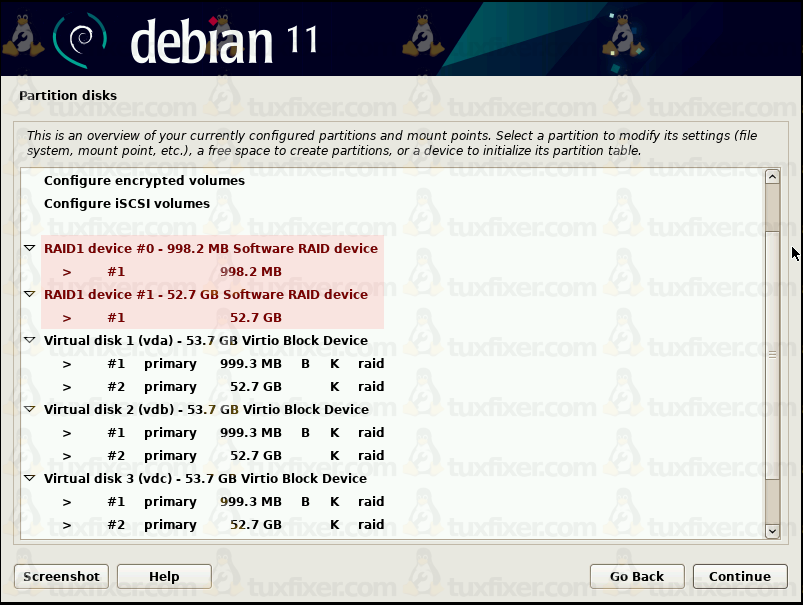
7. Partition Settings for md0 RAID Persona (boot partition)
Since the /boot partition cannot reside on md1 persona, intended for LVM, we will place it on md0 instead, as a standard partition.
Select the RAID1 Device #0, which stands for md0 persona, and click on the Continue button:

7.1 Create a standard partition for boot
Configure partition settings:
- Use as: select preferred filesystem type
- Mount point: /boot
- Mount options: defaults
- Label: set the label for your reference
When done, select the Done setting up the partition option and click on the Continue button.
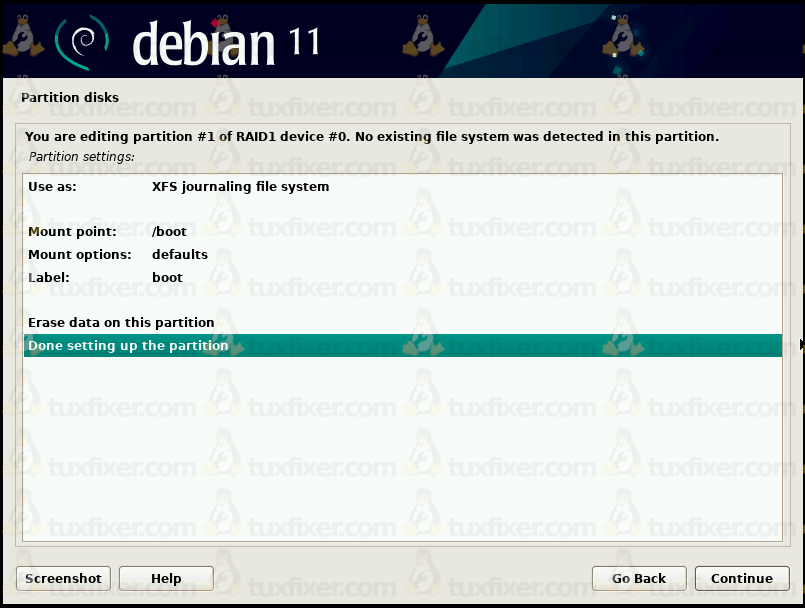
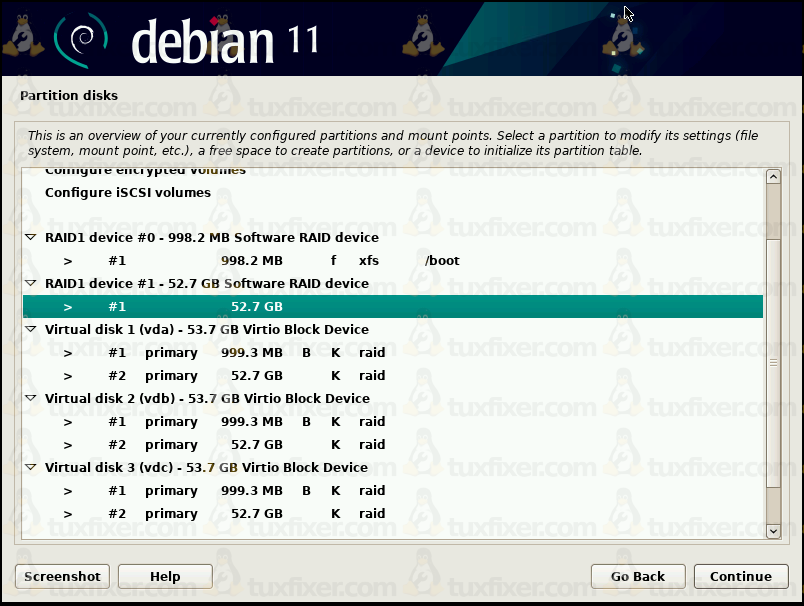
We have successfully created a standard partition on md0 persona, which will be mounted in /boot mount point.
8. Partition Settings for md1 RAID Persona (LVM)
Our LVM Volume Group will contain root and swap Logical Volumes and will be placed on md1 persona, that means md1 will become a Physical Volume for the Volume Group.
Select the RAID1 Device #1, which stands for md1 persona, and click on the Continue button:
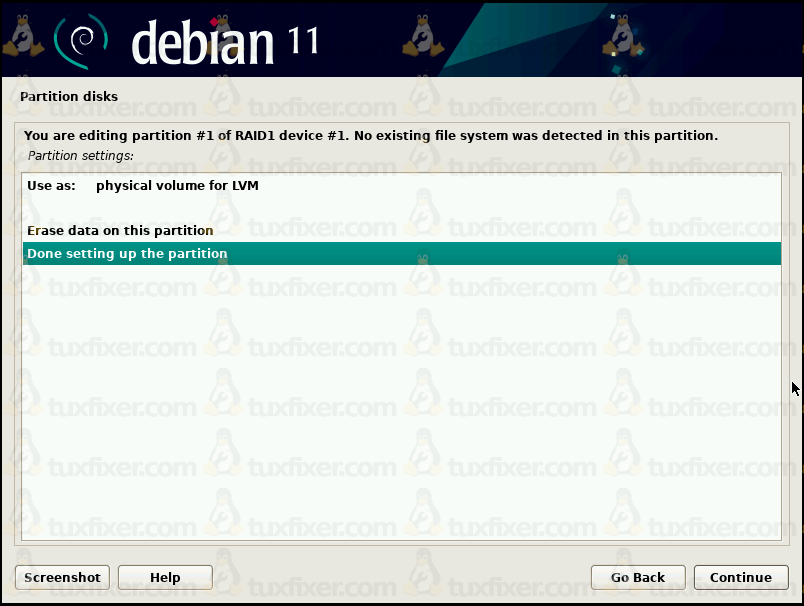
8.1 Create a Physical Volume for LVM
Now create the aforementioned LVM Physical Volume on top of the md1 persona.
Use the volume as physical volume for LVM, select Done setting up the partition option and click on the Continue button.
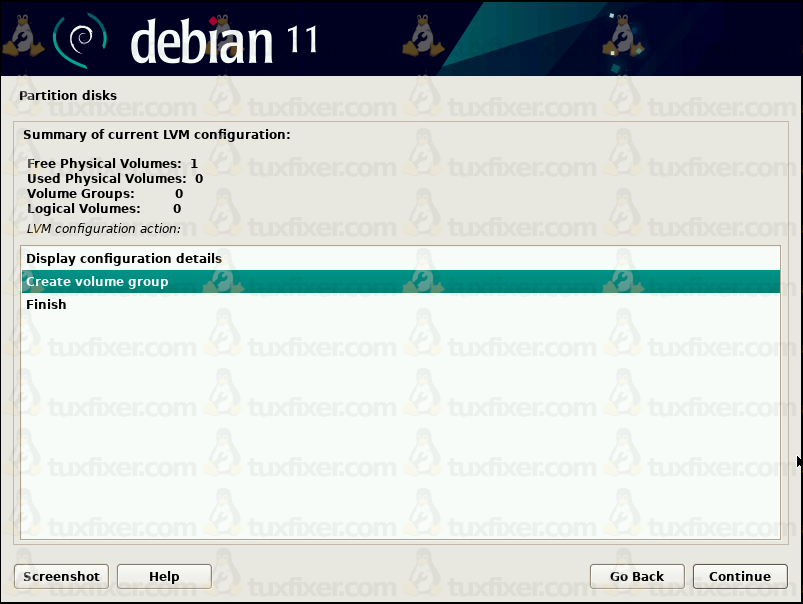
8.2 Create a Volume Group for LVM
Once, we have a Physical Volume created, we can proceed with the Volume Group creation.
Select Configure the Logical Volume Manager option form the menu:

Check the Yes radio button to write the changes to the disks and configure LVM
Now select the Create volume group option and click on the Continue button:
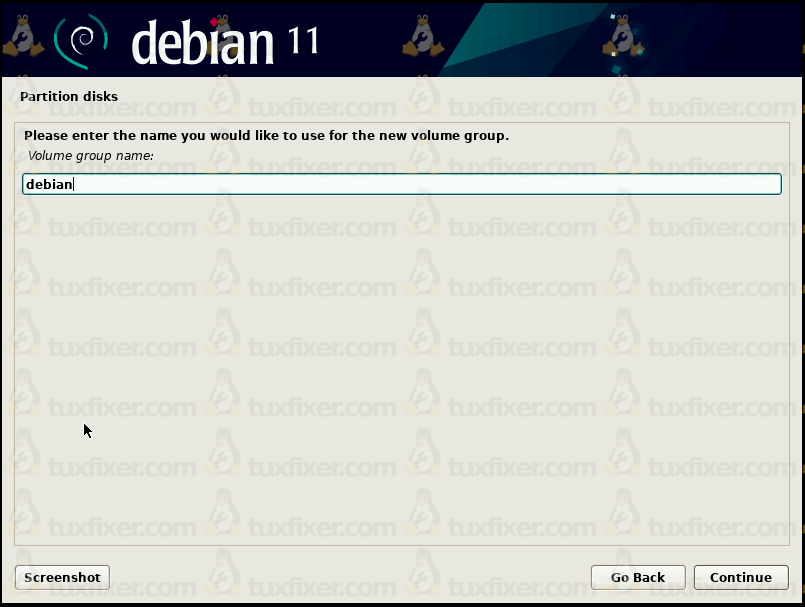
Type in the preferred Volume Group name:
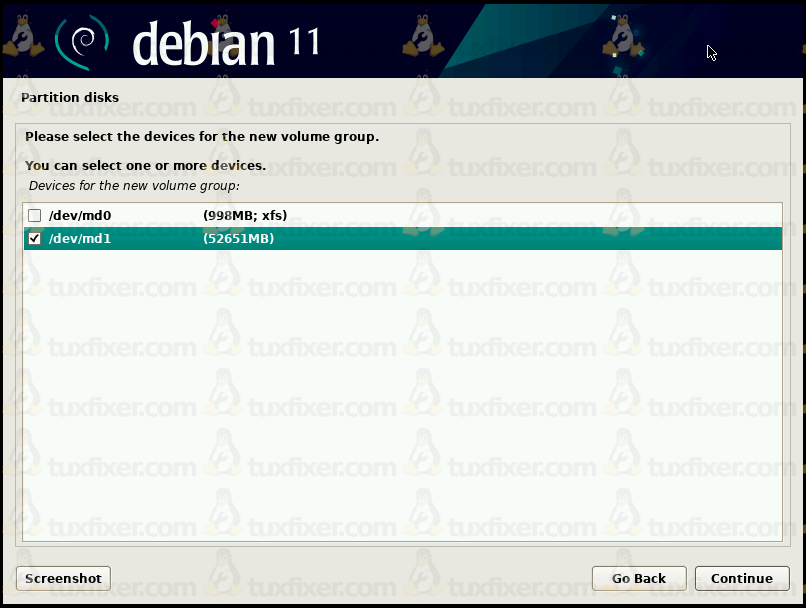
Now is the time to pick the Physical Volume we created in point 8.1.
Choose the /dev/md1 based Physical Volume and click on the Continue button:
We have successfully created an LVM Volume Group, named debian, and in the next steps, we will create the Logical Volumes on top of that Group.
8.3 Create a Logical Volume for the root filesystem
Select the Create logical volume option and click on the Continue button:
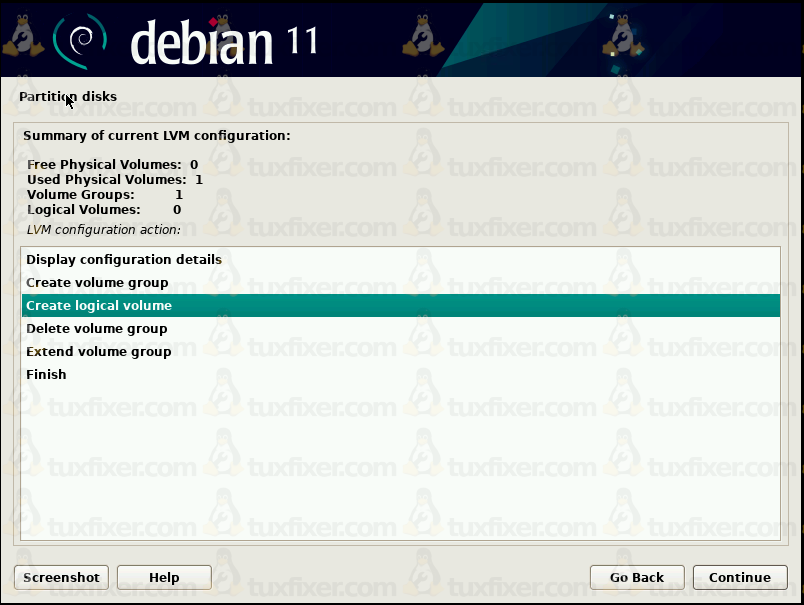
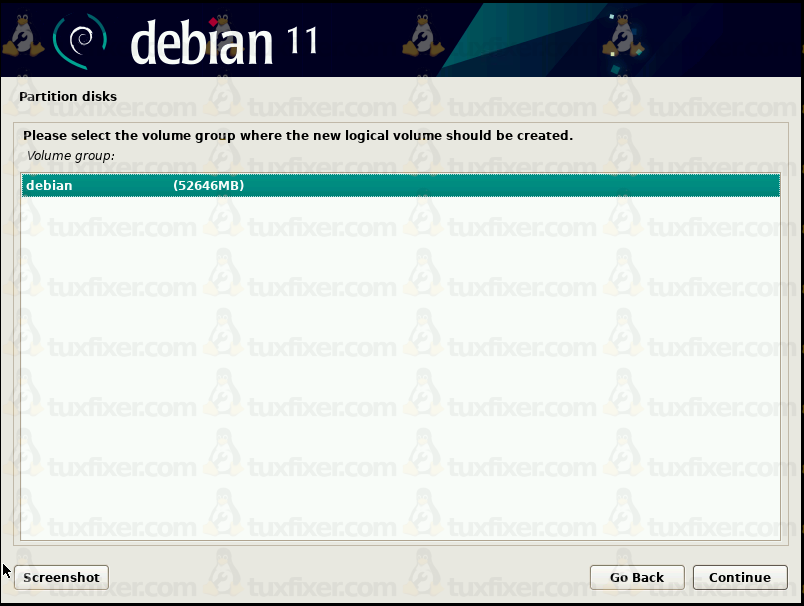
Choose a Volume Group, we have recently created, named debian:
Type in a name for the new Logical Volume, let’s name it root, since it’s going to host our root filesystem:

Enter the size of the root Logical Volume:

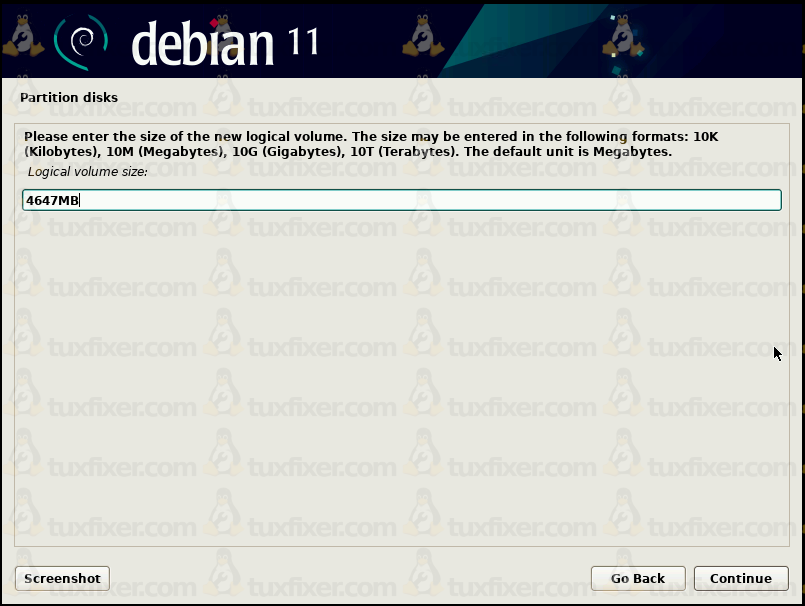
8.4 Create a Logical Volume for the swap partition
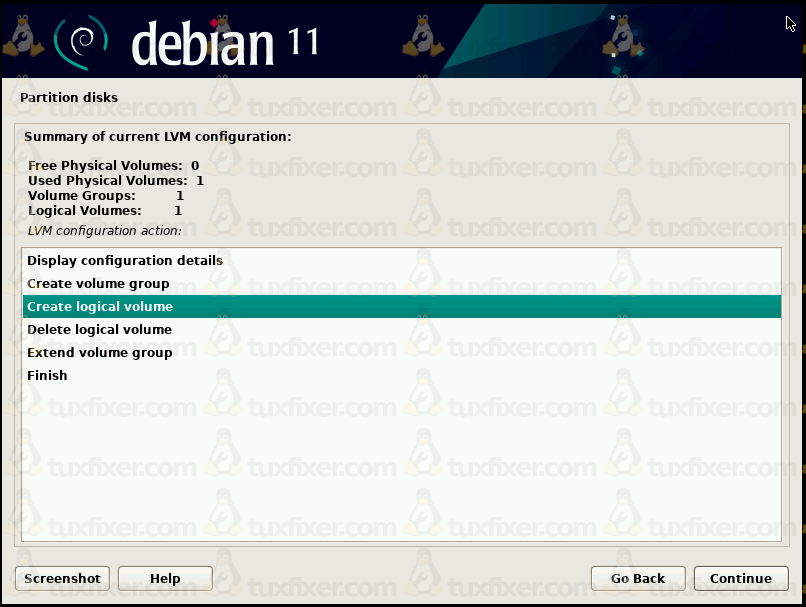
Select the Create logical volume option once again and click on the Continue button:
Select a previously created debian Volume Group:

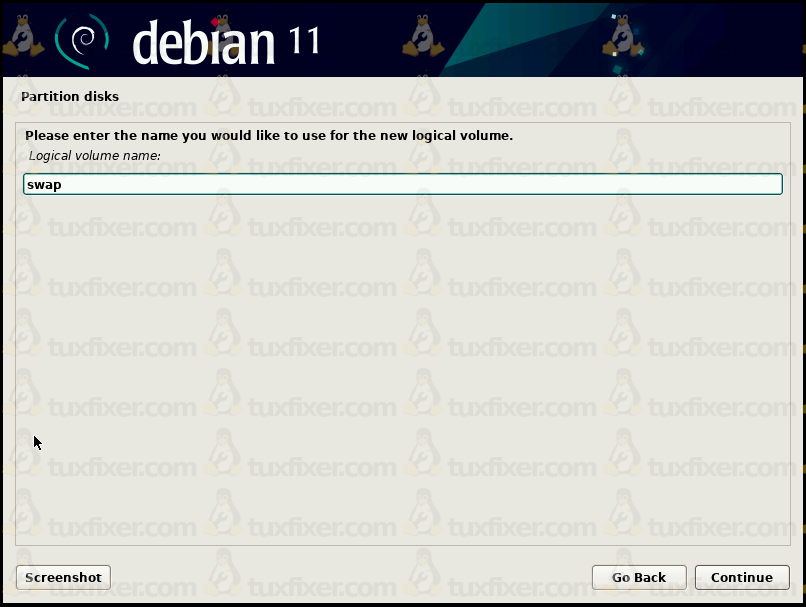
Enter a name for the Logical Volume:
Enter the size for the swap Logical Volume:
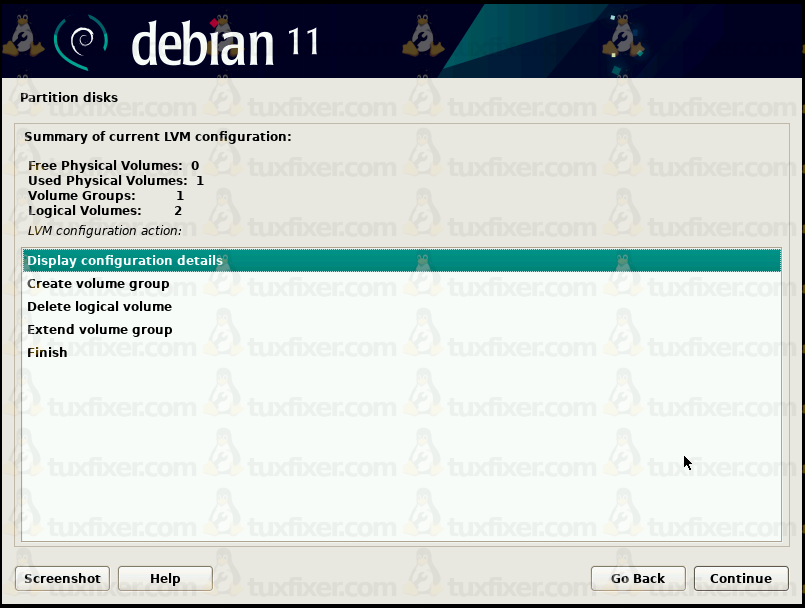
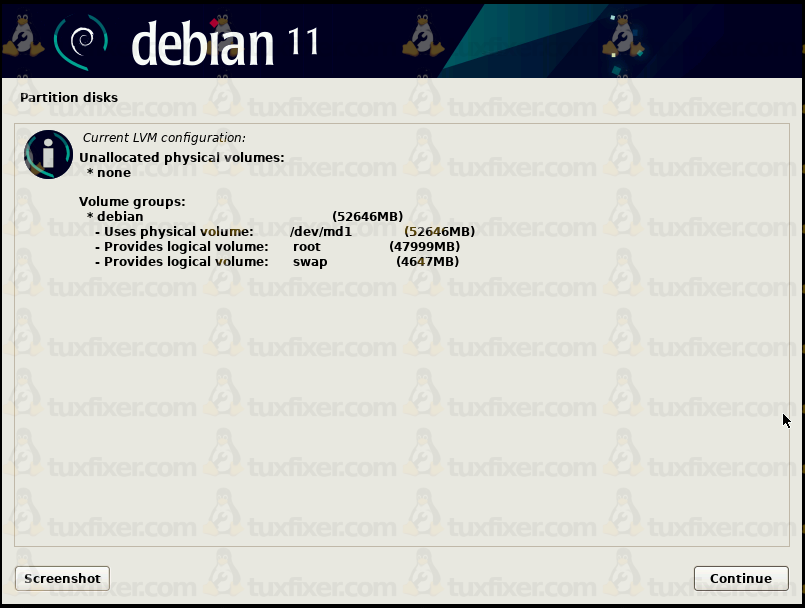
8.5 Verify the LVM Configuration
Once we have created the Volume Group and Logical Volumes, let’s check the current configuration before we write changes to the disk.
Select Display configuration details option and click on the Continue button:
Our final LVM config looks like the below:
Now select the Finish option from the menu and click on the Continue button.

9. Creating Partitions based on the Logical Volumes
We will now format our Logical Volumes accordingly for the root and the swap partition.
9.1 Create the root filesystem partition
Select the root Logical Volume and click on the Continue button:
Configure partition settings:
- Use as: select preferred filesystem type
- Mount point: / (root directory)
- Mount options: defaults
- Label: set the label for your reference
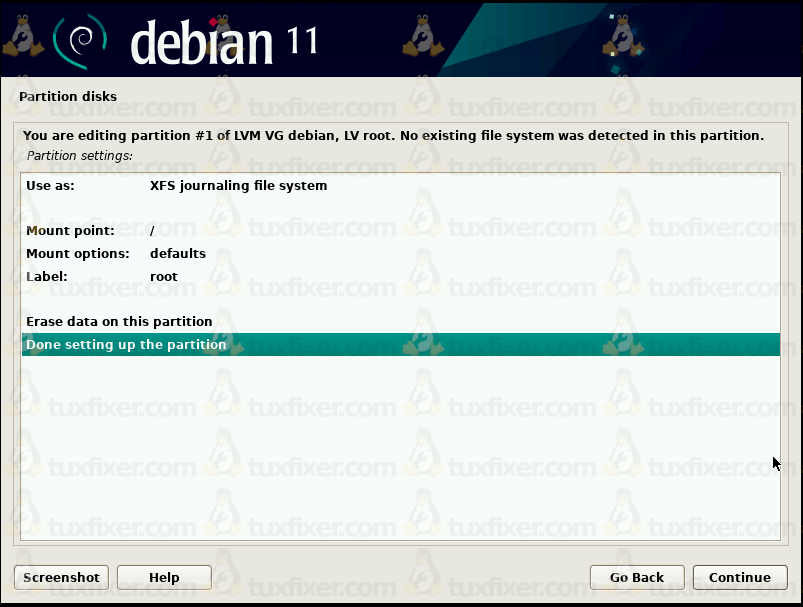
When done, select Done setting up the partition option, and click on the Continue button.
9.2 Create the swap partition
Select the swap Logical Volume and click on the Continue button:
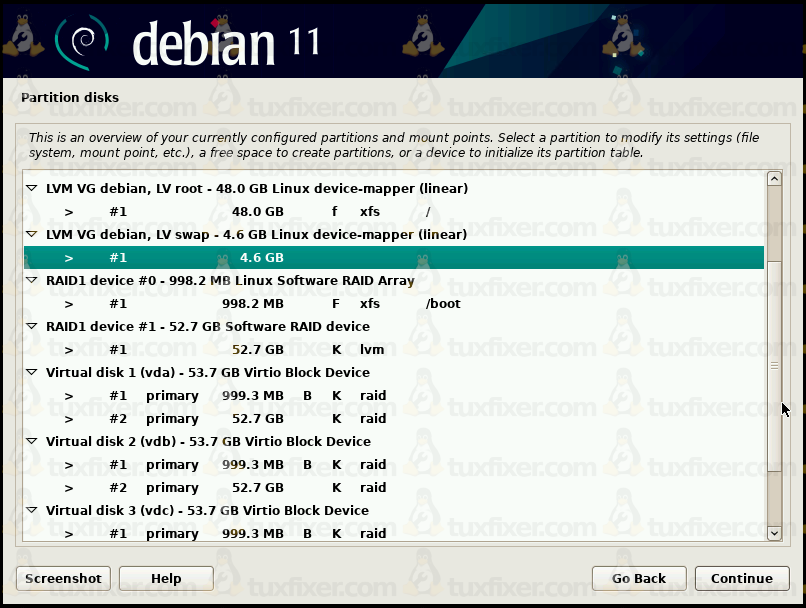
Use the partition as a swap area:

Finally, select Done setting up the partition option, and click on the Continue button.
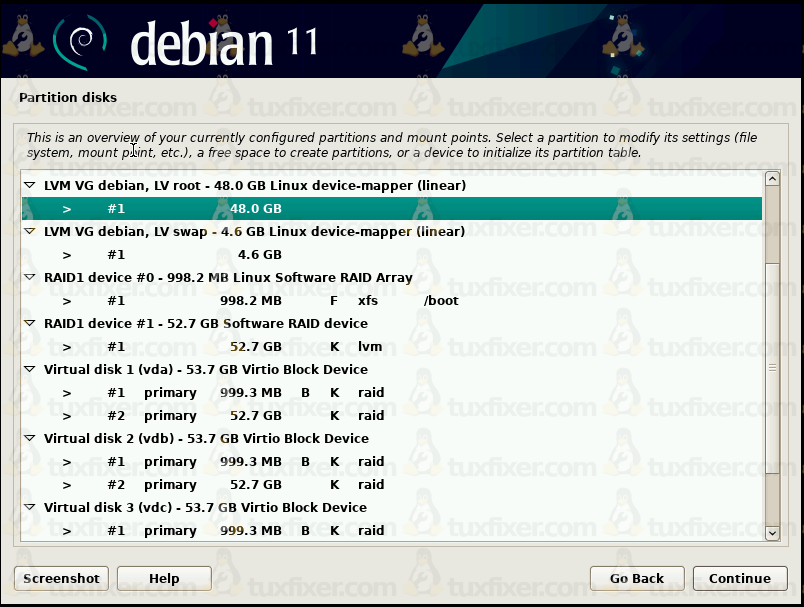
9.3 Review the disk layout and write changes to the disk
This is our complete and final disk layout:
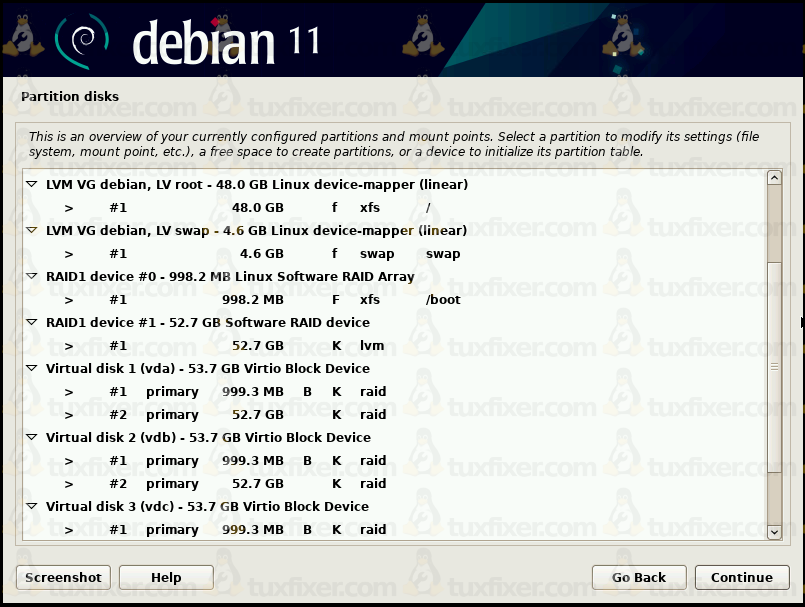
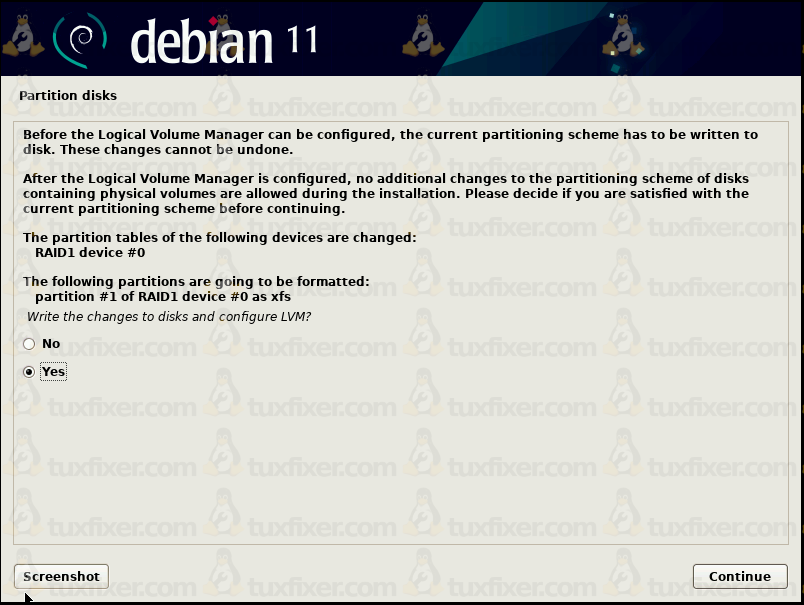
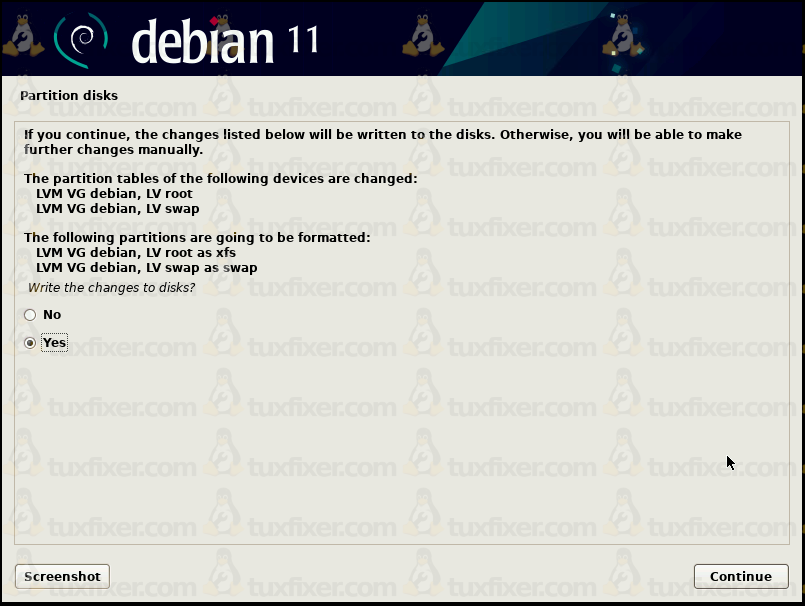
Scroll down the screen, select the Finish partitioning and write changes to disk option, and click on the Continue button:
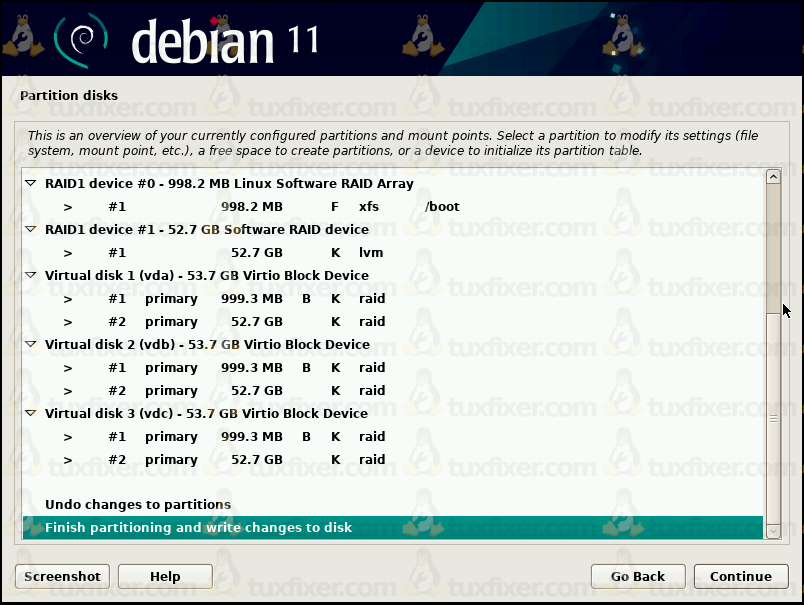
Check the Yes radio button and click on the Continue button to write changes to the disks.
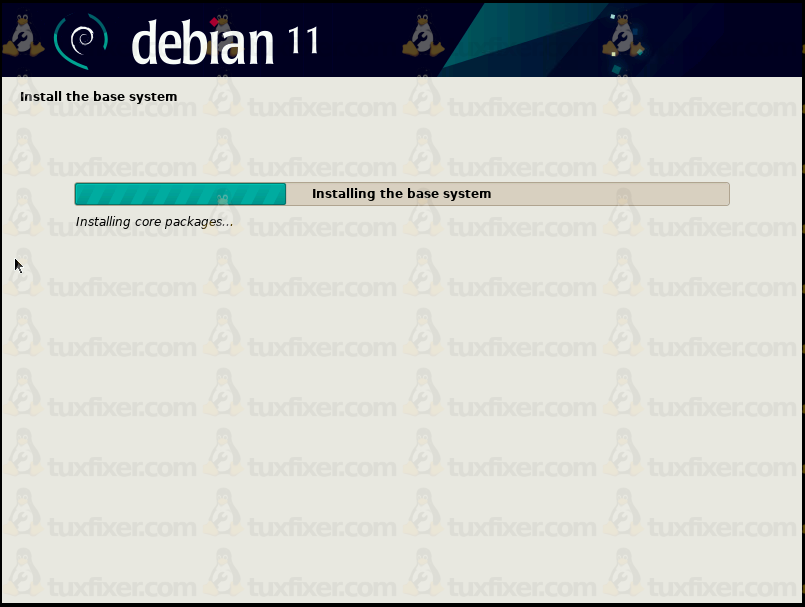
10. Installing the Base System and Software Packages
Once the partitioning is finished and the changes have been written to the disks, the base system installation will begin right away:
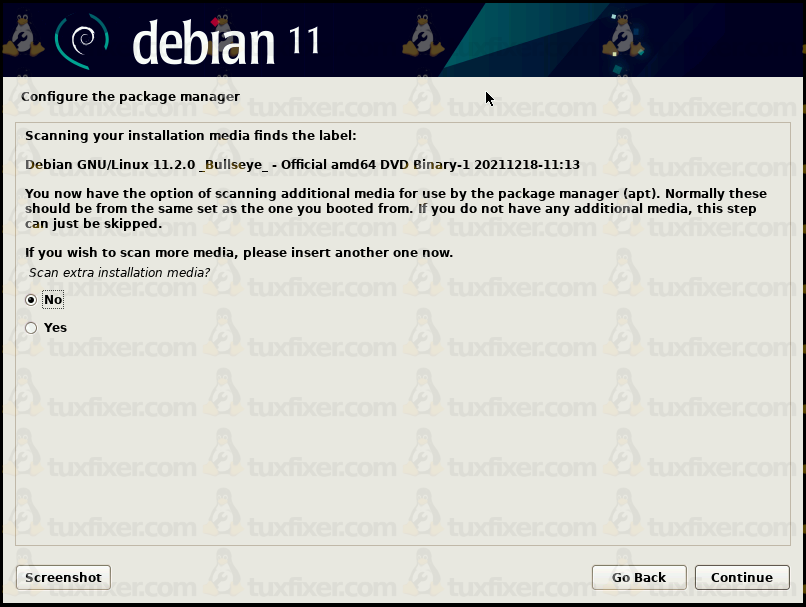
10.1 Configure the Package Manager
If you don’t have any additional installation media to scan, choose No when prompted:
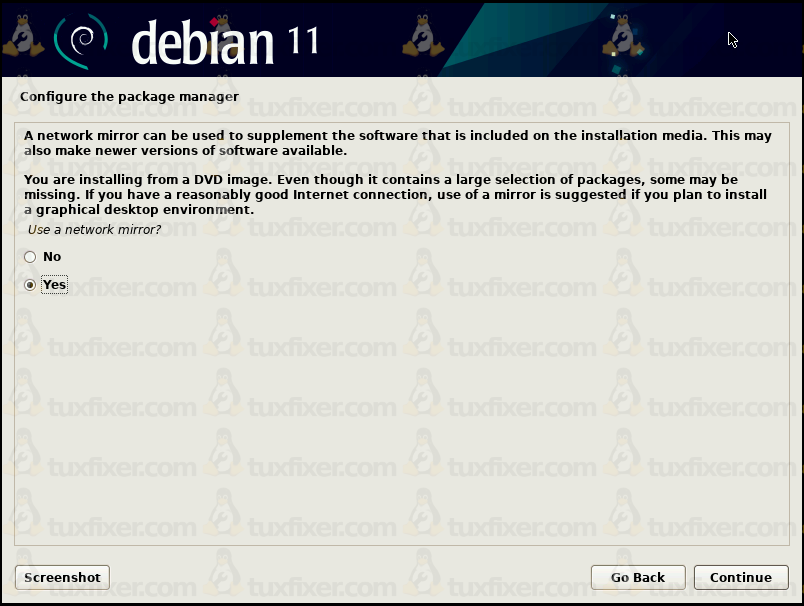
Use the network mirror for the supplementary package installation:
Select Country to look for the most suitable archive mirror:
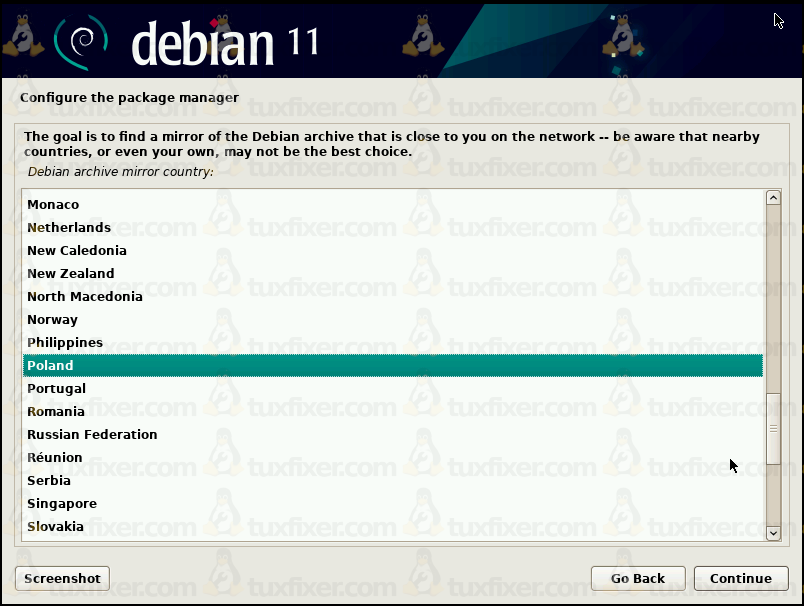
Select a Debian archive mirror from the list:

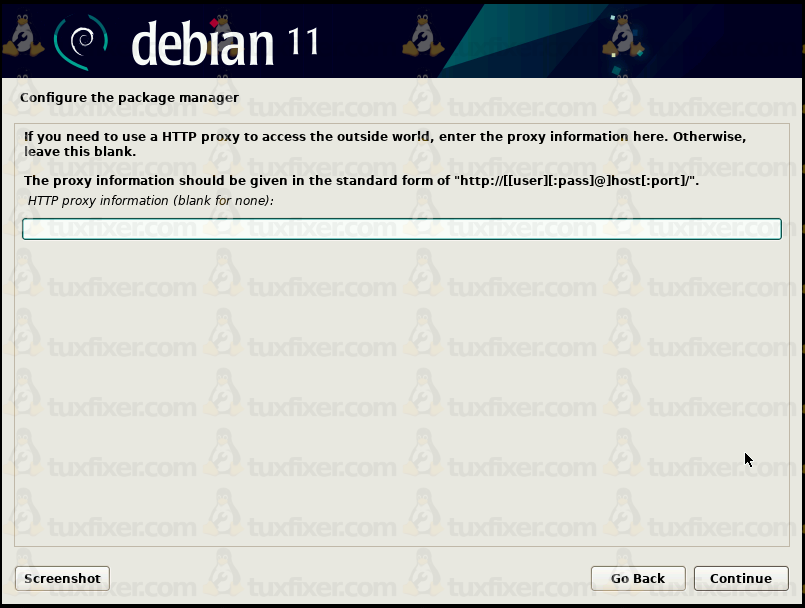
Enter a proxy server for external connectivity, if you use one in your network:
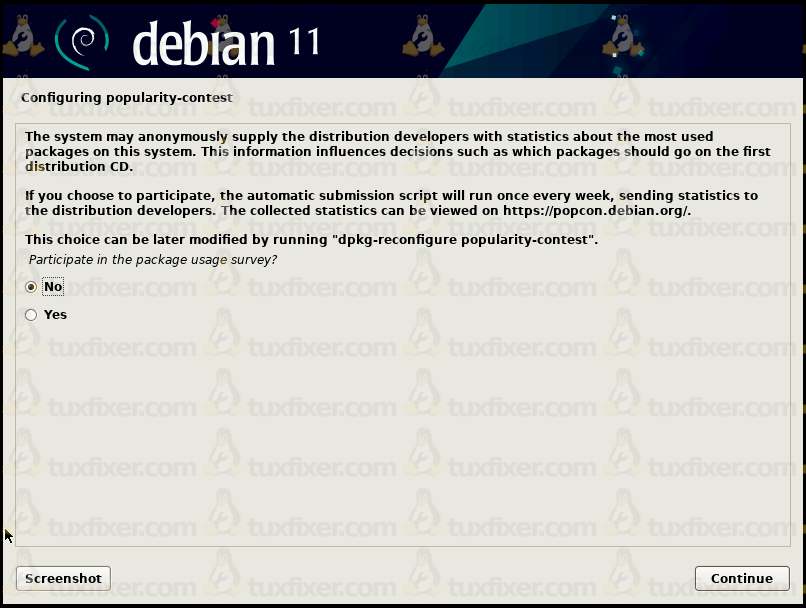
Decide, if you are going to participate in the package usage survey:
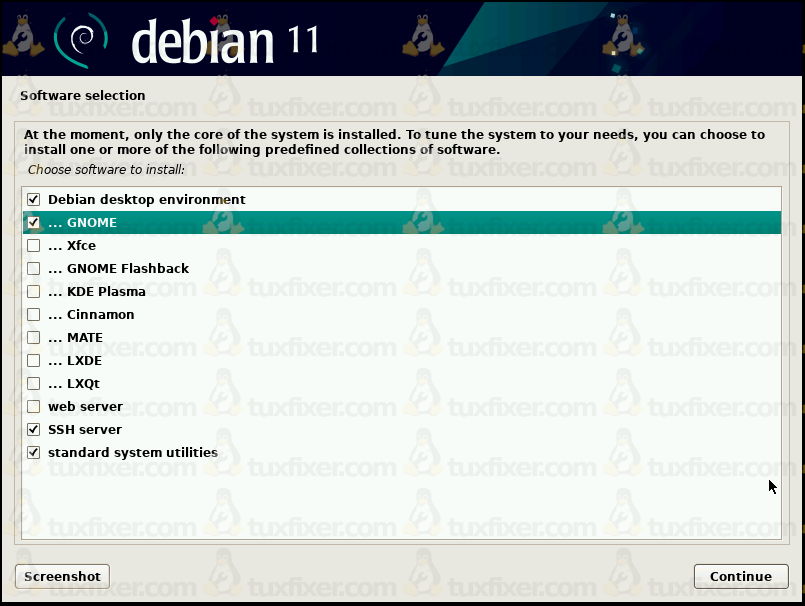
10.2 Select the software
Select the software collections you would like to install along with the system and click on the Continue button:
11. Configuring the GRUB Boot Loader
Now is the final, and a bit tricky part of the installation – choosing a location for the GRUB Boot Loader.
11.1 Install the GRUB Boot Loader
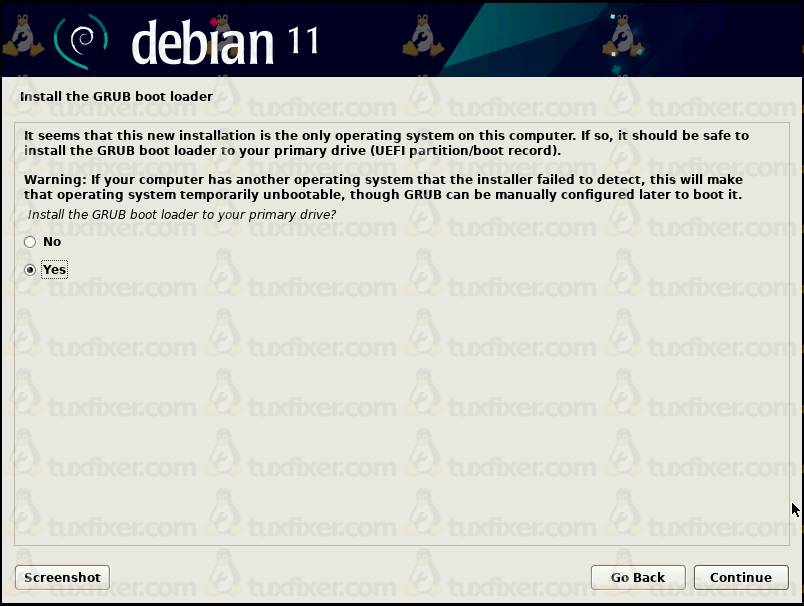
When prompted for the location, check the Yes radio button to install the GRUB Boot Loader to your primary drive:
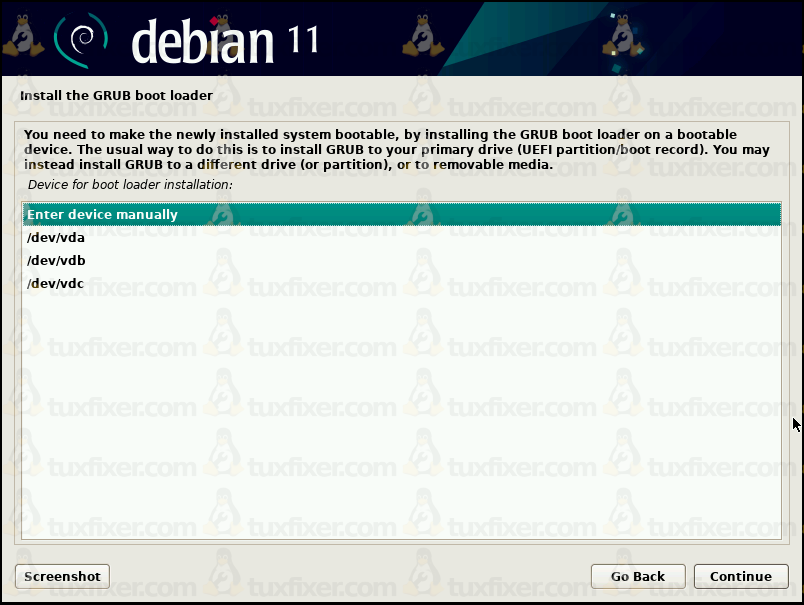
On the next screen, select Enter device manually option:
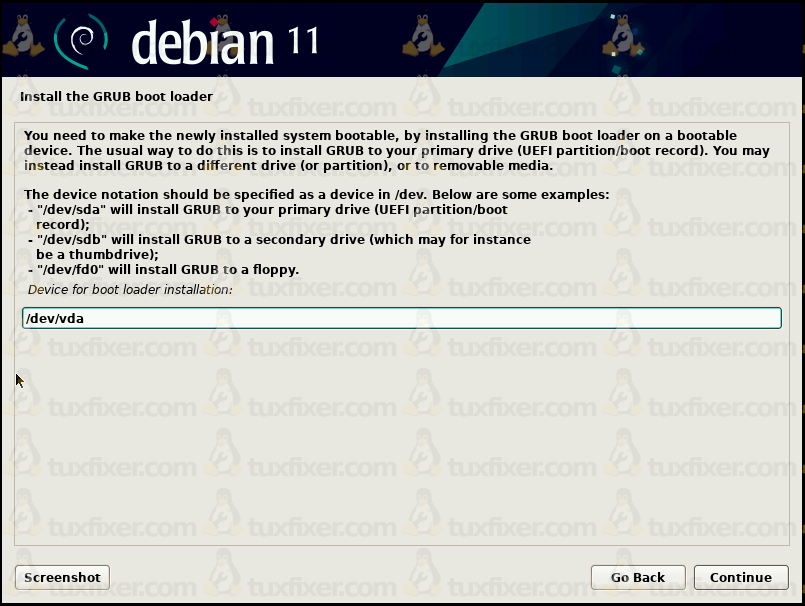
Now enter the /dev/vda as the device for boot loader installation:
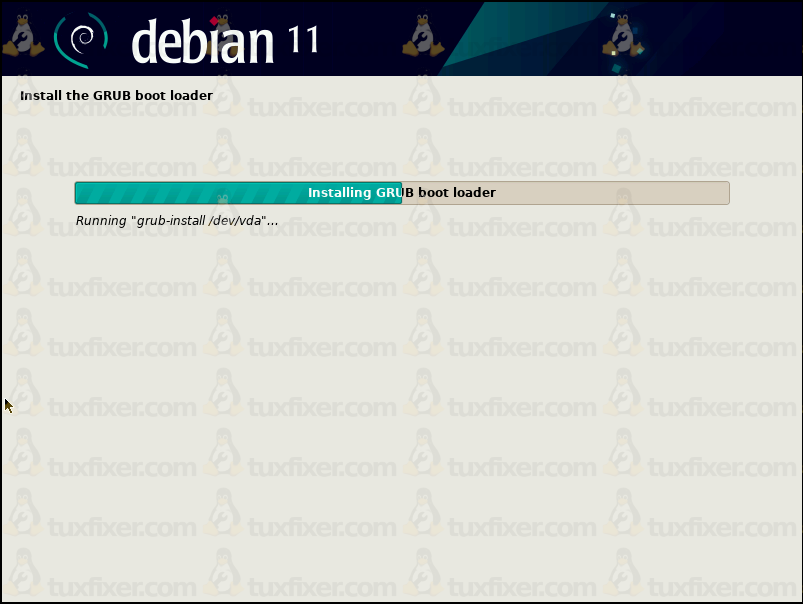
The installer will now run grub-install /dev/vda command on /dev/vda disk:
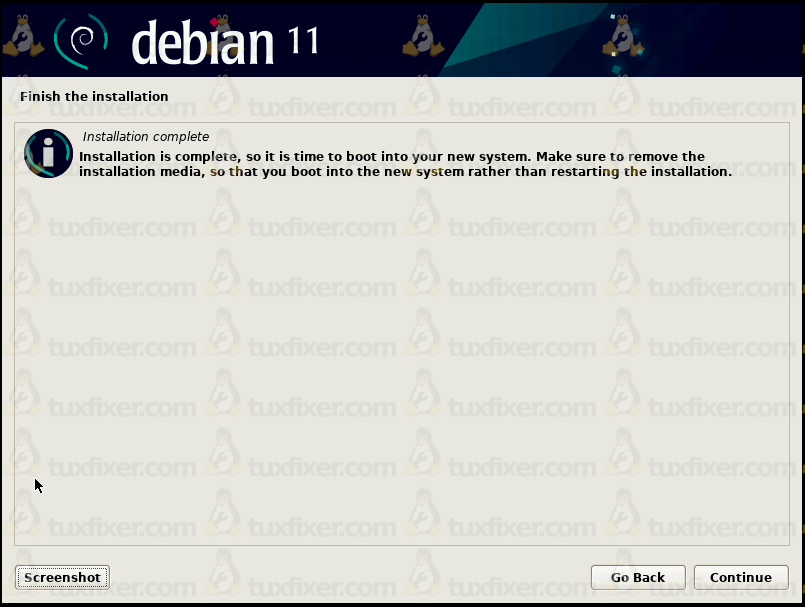
The installer says the installation is complete:
…but it isn’t. In fact, the GRUB loader has been installed on /dev/vda device only, so we need to install it on the remaining devices, that is vdb and vdc.
So now, switch to the other console by pressing CTRL+ALT+F2, and activate a console by pressing ENTER.
Change the root directory to the installed system:
~ # chroot /target /bin/bashInstall GRUB on /dev/vdb:
root@debian:/# grub-install /dev/vdb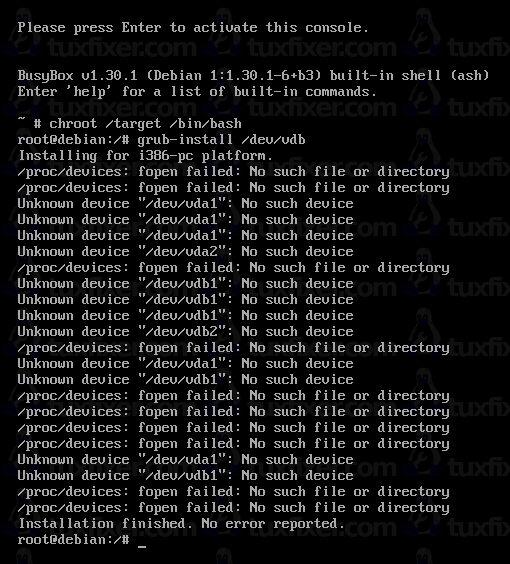
Finally, install GRUB on /dev/vdc (spare device):
root@debian:/# grub-install /dev/vdc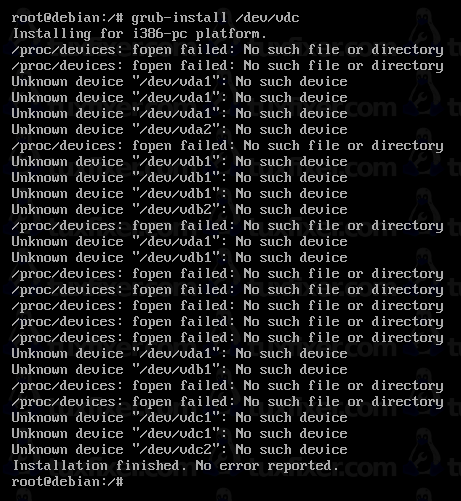
Now press CTRL+ALT+F5 to go back to the Debian installer console:
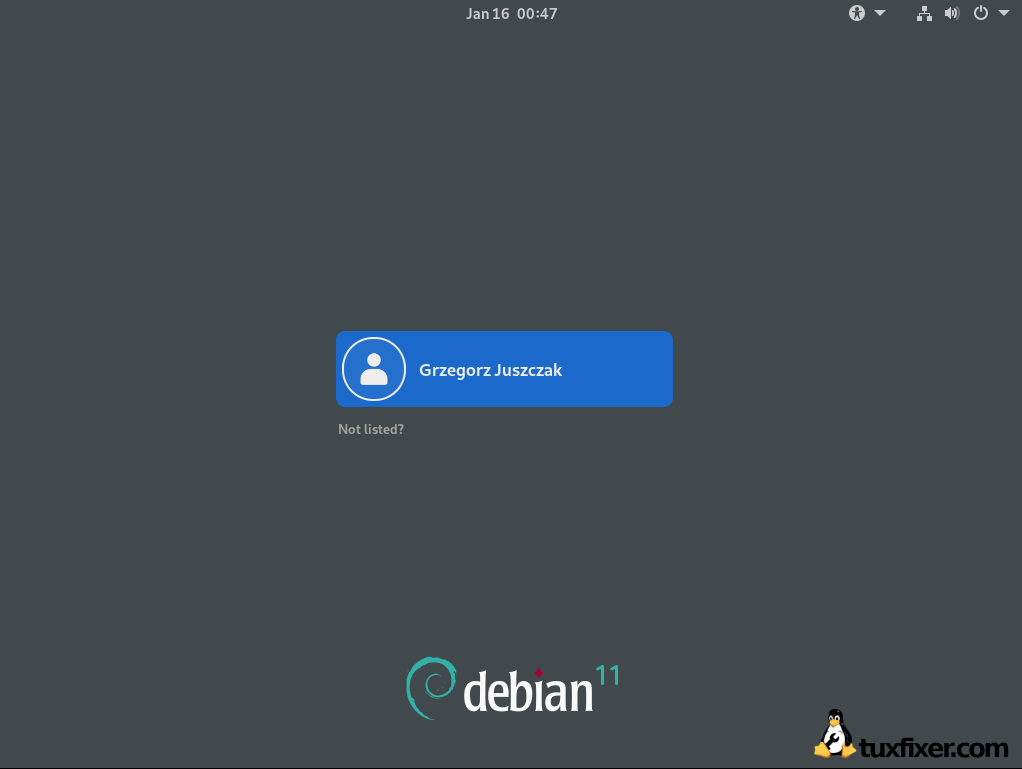
Click on the Continue button to reboot the system.
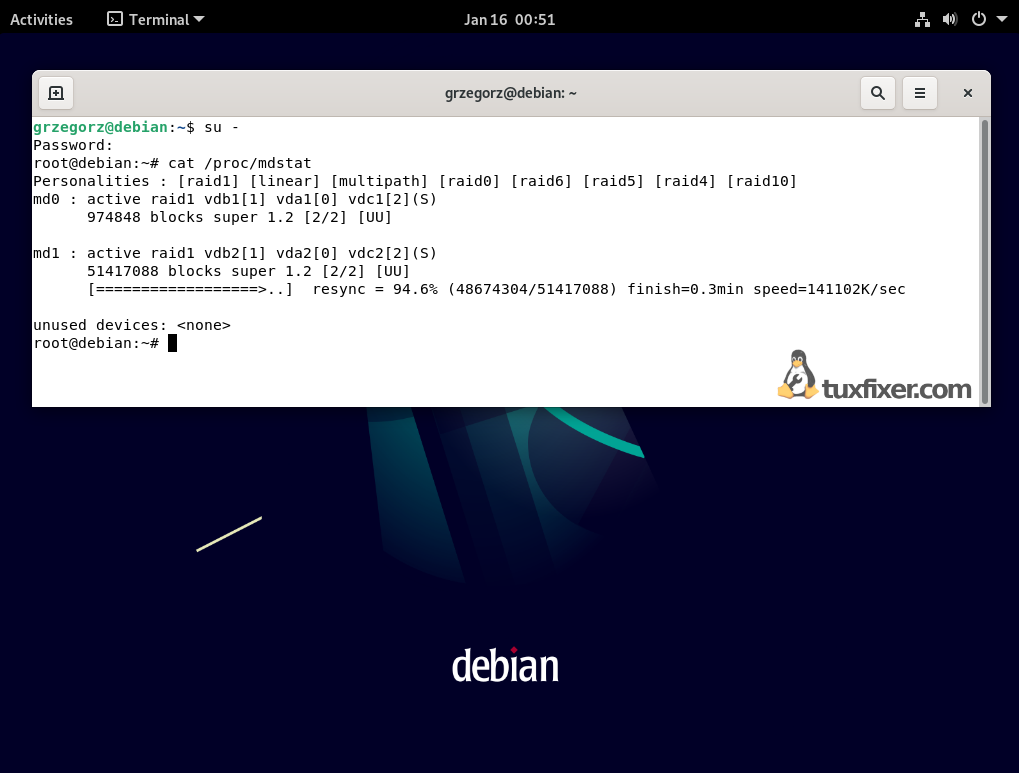
12. Verify the disks setup
After reboot login to your system:
12.1 Check RAID synchronization
Your RAID (md1 persona) should be now resyncing or already resynced:
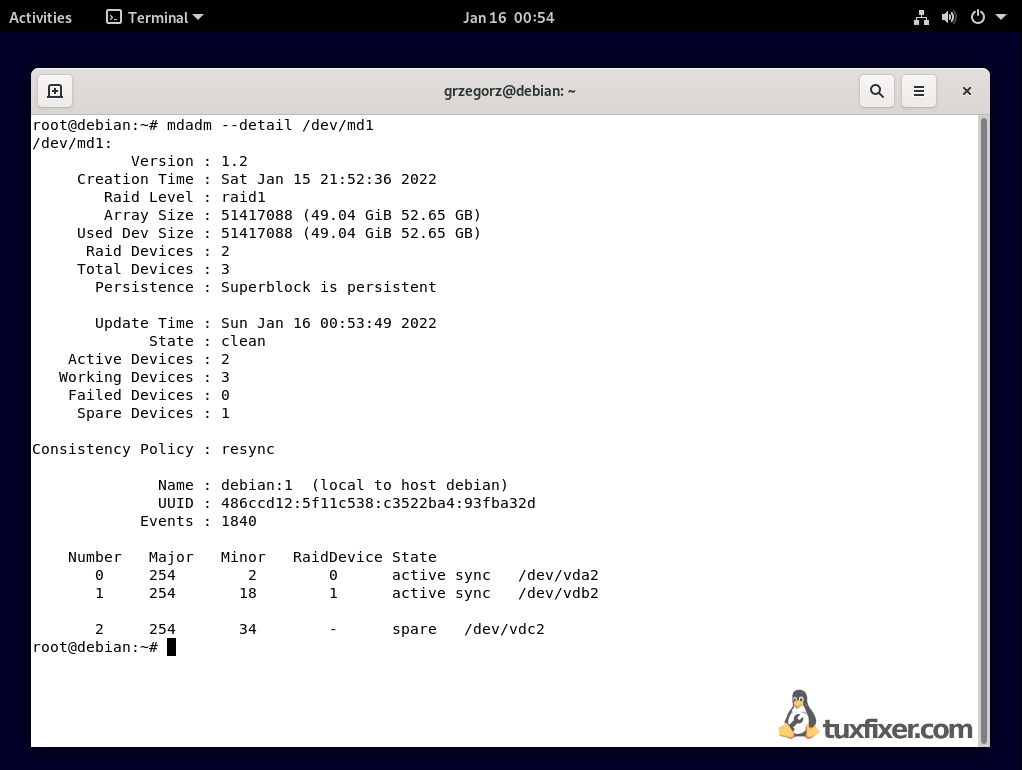
12.2 Verify RAID Personas
RAID md0 persona details:

RAID md1 persona details:
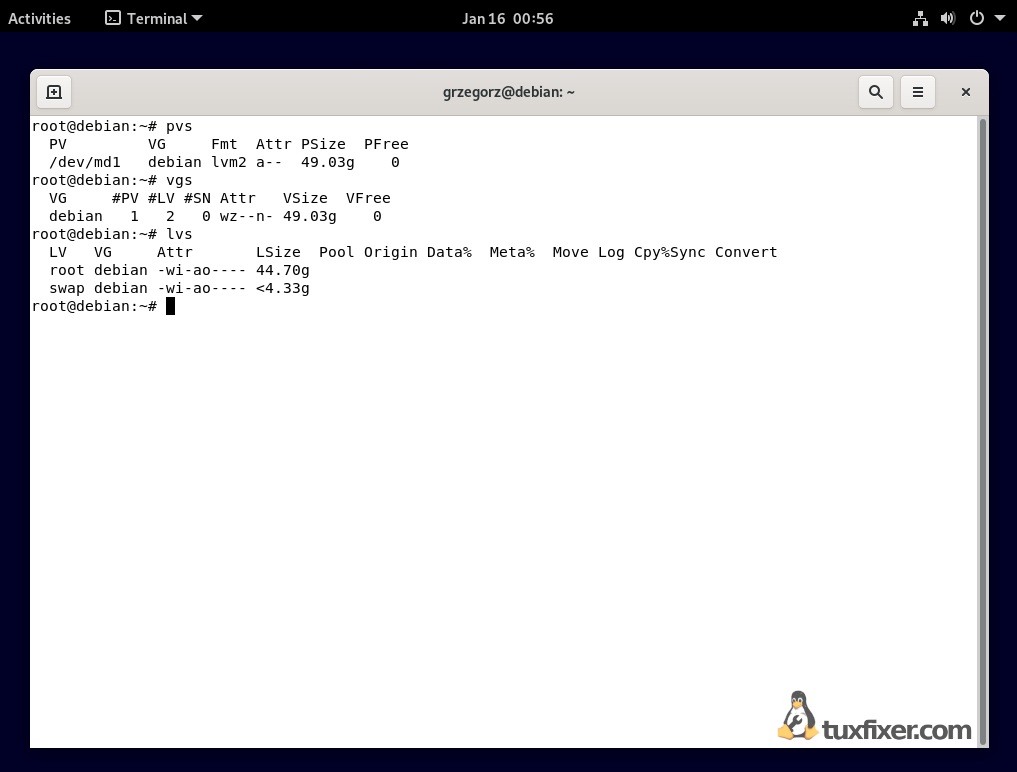
12.3 Verify LVM Setup
Finally, verify LVM configuration:
Can you show or explain how to do this with UEFI? This method only works with legacy If I’m not mistaken.
On the image 89, you can just type:
/dev/vda /dev/vdb /dev/vdc
So you can skip the extra steps to install the bootloader on other disks.
Works pretty well if you remove the first disk, it will boot using the second one and so forth.
The only thing I didn’t figure it out is… if you replace the first disk with an empty one, then the boot fails and you need to repair it on rescue. Any tips on that?
Thank you for a good hint navossoc, I will give it a try in some upcoming installations.
Regarding your concern:
“if you replace the first disk with an empty one, then the boot fails and you need to repair it on rescue” – If you replace the first disk and you recreate the partition table on that first disk (using sfdisk) and then you install the GRUB bootloader on that first disk in the same way, like on image 92 then it SHOULD NOT FAIL during next boot, the whole replacement procedure in software RAID I described in the below post:
http://212.127.73.129/how-to-replace-a-volume-in-mdadm-software-raid-array/
Please let me know if the above link fixes your problem?
Yes, that way works…
What I mean is:
If you remove the first disk, it will boot using the bootloader from the second disk (GOOD).
If you replace the first disk with an empty one, it will fail at boot needing reinstall the grub on the first disk (BAD).
Is there anyway to do like in the first case? fallback to another disk…
I think the purpose of having a /boot in raid 1 is exactly that (to be used as a fallback).
Ok, I get your point and IMHO this is a shortcoming of mdadm software RAID that the disks that are currently in the RAID array are still visible in BIOS as individual disks and Boot order is set for individual disks, not for the whole RAID array.
In first case that you described the system will boot probably because in BIOS’s Boot Order you have a second disk placed right after the first one, and the first one is gone so BIOS will try to boot from the second one.
If you replace the first disk with an empty one (without recreating partitions and GRUB) it will fail because BIOS will still try to Boot from first one, but there will be no OS installed on the first drive, because mdadm software RAID does not rebuild itself right after replacing the disk – in this case you will have to set Boot order in BIOS manually to second disk in order to boot from second disk.
This problem would not happen if you had a hardware RAID controller, which would rebuild itself automatically after replacing the failed disk, and moreover boot order in BIOS wouldn’t be altered, because BIOS would still see the whole RAID array as one logical disk regardless of the amount of working disks in the array.
So I am afraid you can’t do anything about it – it’s the disadvantage of software RAID versus the hardware RAID.
I see, it makes sense…
I think we will need to live with for now.
Thanks for the time.
Thanks for that fantastic tuto that is very clear and works like a charm 😉 after few hours killing my head to succeed to install Debian in such configuration, have worked straight at first try !
Finally – a post that actually deals with setting up RAID1 from scratch and is, as far as is possible in the never ending tweaks that constitute Linux, up to date and correct. RAID using mdadm etc. etc. is still a complete mess in comparison to ZFS but unfortunately, wonderful as ZFS is on Solaris, it remains an even bigger unworkable mess on Linux. And we won’t start on BTRFS which should, really, be humanely euthanised
on Image26, Debian installation doesn’t allow me set bootable flag “on” so on the last step where grub-install running I have error..
It seems I found out this bug(your installation was successful because you used very small disk, try disks with >=2TB 🙂
It is very old bug which Debian devs don’t care to fix, 13 years old already..if interested you can follow it here: https://bugs.launchpad.net/ubuntu/+source/debian-installer/+bug/477167
Wow, that’s a pretty old one indeed, and you are certainly right – if I tried to install it with large disks, I would probably run into the same problems.